
Get more details about this project
What you need
1 sheet of approx. 20cm x 20cm exterior fabric
1 sheet of approx. 20cm x 20cm interior fabric
1 sheet of approx. 15cm x 20cm fusible wadding
Matching machine sewing thread
Instructions
Approximate Finished Size
Width: 12cm
Height: 6cm
This depends on the template used
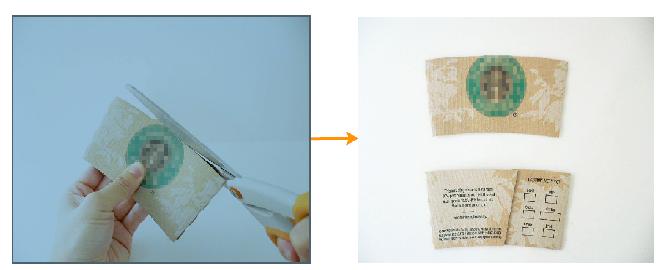
Step 1. Cut the sleeve in two equal parts. Trim if necessary for a smooth shape.
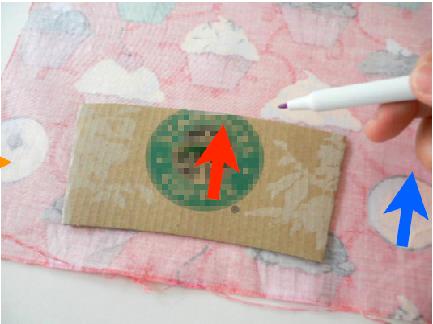
Step 2. Outline the pattern onto the exterior fabric. Add 1cm seam allowance. Make two. Repeat the same process for the interior fabric. Make sure that the vertical line on the sleeve (red arrow) is aligned with the grain of the fabric (blue arrow).
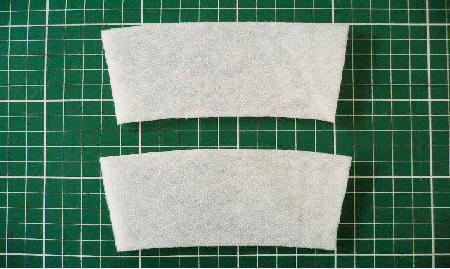
Step 3. Repeat the same process with the fusible wadding WITHOUT adding the seem allowance.
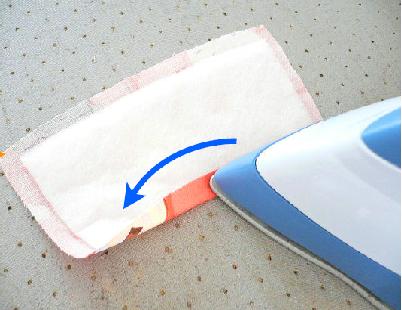
Step 4. Iron the fusible wadding onto the exterior fabric. Do not iron on the wadding side as this will melt and stick to your iron. Always iron on the fabric side. Fold the lower seam and without touching the actual wadding (to avoid melting it) iron inwards. Note that the ironed seam is slightly curved (see blue arrow).

Step 5. Repeat step 4 for the other exterior fabric. For the interior fabrics, do the same but without the wadding.
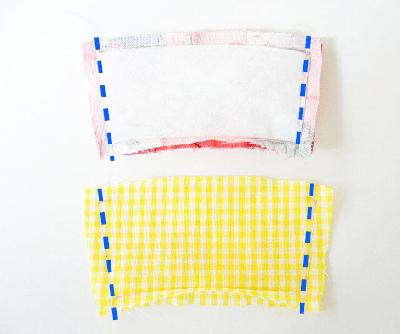
Step 6. Sew the side seams (blue dotted lines).
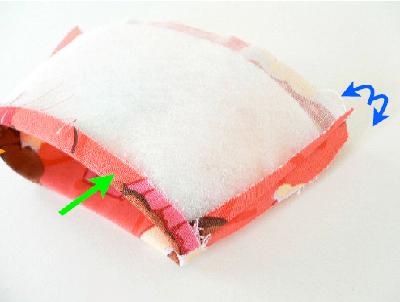
Step 7. Open the side seams and iron gently (blue arrows). Make sure that the bottom seam is still folded inwards (green arrow). Repeat for the interior fabric.

Step 8. With the right side facing each other, place the interior fabric inside the exterior. Sew the top seam (blue dotted line). Pull the interior fabric out and open the sewn seam. Gently iron the shaded area.
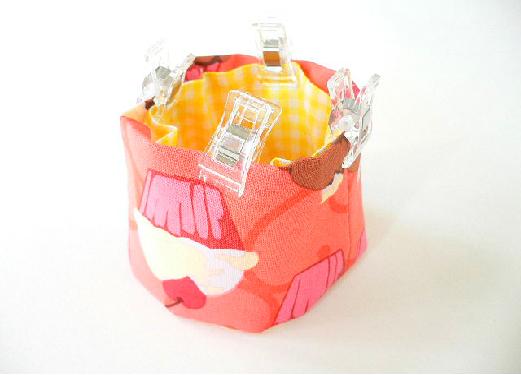
Step 9. Turn the work back out. Secure the bottom seam (remember it is folded) with pins or clips.
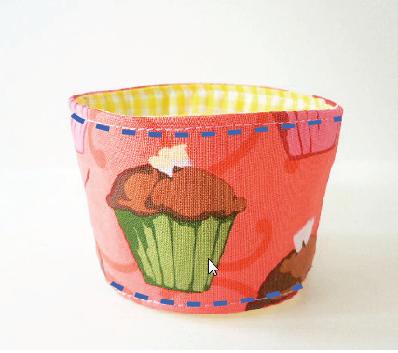
Step 10. Finally, sew the bottom seam at 2.5mm from the edge. Then sew the top at 2.5mm from the edge (blue dotted lines).

Step 11. Enjoy!
Reprinted with permission from Kyoko Nakayoshi’s website Cotton and Cloud.


lol we all know its starbucks.. I might make one for my college bound bro