
Get more details about this project
What you need
Elastic
Fabric
Pins
Sewing machine
Scissors
Instructions
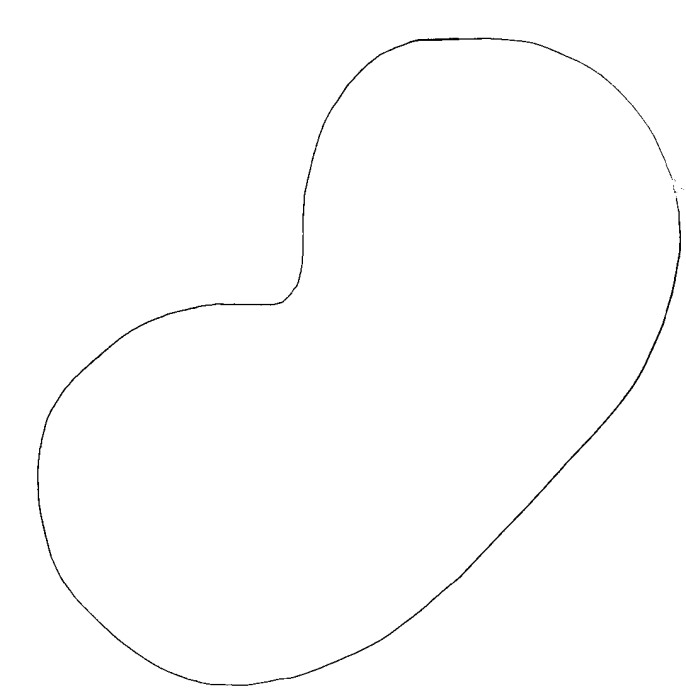
Start by printing the Eye Mask Pattern first.
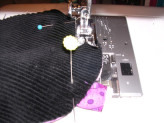
1. Pick fabric and place with piece that touches your face (pink flannel) the good side up, pretty fabric (pink print) good side facing the flannel (basically right sides facing eachother) and your darkening stuff. I used corduroy cause I had it. Check it against a lamp and see if your fabric works for darkening.
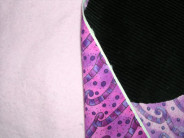
Eye Mask Tutorial Step 1
2. Place on top of all three fabrics and cut them all out at the same time. Makes it faster! Your pieces should look like this and keep them in that order.
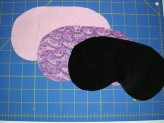
Eye Mask Tutorial Step 2
3. Cut a piece of elastic measuring about 17 inches (adjust to the size of your head). and cut out a piece of fabric that will be the covering for the elastic 2 inches wide by 21 inches long. If you don’t want a covered elastic ignore the fabric part on this step.
Eye Mask Tutorial Step 3
4. Fold the fabric for the elastic cover in half lengthwise and sew it 1/4 inch from the edge. Turn right side out and then iron it so that the seam is in the middle of one side. Feed the elastic into the tube of fabric. Make sure you pin the elastic at each end so that it doesn’t get lost inside.
Eye Mask Tutorial Step 4
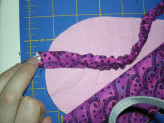
5. Take your mask sandwich and gently pin the tube with elastic in place.
6. Pin around so that the pieces will stay together.
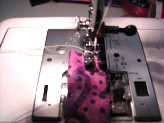
7. Go to the sewing machine and sew around the mask about 4/8ths (the line between 3/8 and 5/8) this doesn’t have to be so precise just even. Make sure to leave a space open at the top so that you can turn the whole thing right side out later on. Check that you sewed it even and if not just rip some out or sew a bit closer to make the curves even.
Eye Mask Tutorial Step 7
8. Trim so that you have about 1/4 inch left all around. and clip the curves so that they turn better.
Eye Mask Tutorial Step 8
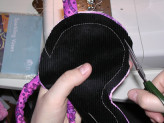
9. Turn right side out and shape. Iron your mask so that its all pretty and flat. Turn the edges in on the top press them so they stay in and hand sew closed with a hidden stitch. ( i cheated and haven’t sewn mine yet. hence no pictures of me actually hand sewing.)
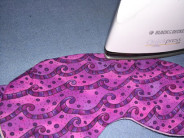
Eye Mask Tutorial Step 9
10. Sit back and enjoy your pretty sleep mask.
11. Go have a nap with all the lights on to try it out.
This project was contributed by Sarah. For more of Sarahs creations visit her website Silly Button


wow
Thanx, so helpful have been trying to draw a template my self but all quite bad… so i google searched and found your image.. defently the best thnx again..
Holly
Thank you so much. I am making this to match the silly pillow case that I make every year for her birthday
Great directions. I got the idea to look this up because I had a migraine and I needed total darkness…. This worked perfectly. I’m going to make another one just to have a spare. Thank you so much! SR
Great project!
I enlarged the pattern to the correct size but it still feels a little small to me-if I make another I will enlarge it a bit more.
Also, I think the instructions on step 6 are a little unclear. You need to make sure the elastic is INSIDE the sandwich, so when you turn it it will be on the outside. Also be sure when you do that, the elastic is not twisted!
Two guesses how I know this. Luckily I am good with the seam ripper, LOL.
Thanks for sharing this, when I printed out the template I noticed it says “scaled 81%” at the top of the page, so probably it needs to be cut a bit bigger to fit an adult but would do fine for a child.
i am so lazy , so i must need it . Thanks for the help………
Thank you for the pattern and tutorial. I am traveling to Japan, and have wanted a sleep mask for the trip. Thank you for answering my need. Happy sewing!
i think this is very well done. thanks for taking your time to upload pics too becasuse they are very helpful! 🙂
Great mask! I found that I needed the template to be a bit longer, I like the coming a bit further toward the ears, but otherwise, super cute! Thanks:)
Just what I was looking for to give as party favors for my daughter’s slumber party.
if i could rate 1 million stars i would!
its so cool
I love the sleeping Mask idea – good for sleepovers!!!
this sleeping mask idea was so mutch fun i love it!=)
You could have like a t-shirt with a photo printed onto it done and cut out the eyes so that the user could insist that he or her was awake 😛
Thanks for the very well-thought-out instructions! I’m looking forward to making one of these, maybe with a satin backing. Also, to the Guest who suggested the cucumber slice decoration — too funny! A great idea.
Thx for posting
great instructions, cute mask
i like
please come up with cool ideas
exactly what I was looking for! thanks for including photos in the instructions- so helpful!
Looks so easy, super simple instructions and photos too. Thank you-can’t wait to try it out.:) These will make great little gifts!
The old fashoned way is better. I made one with no instructions and it turned out 10 times better then any other eye maske in the UNIVERSE! ALL HAIL MY EYE MASK!
I loved your pattern. I’m going to embroider a cucumber slice on the front of each eye section My grandaughter is having a “Spa” birthday party so each little girl will get her own mask How cute is that!
She going to be 9yrs. Won’ the girls will love it
This is a great pattern! thanks
I didn’t flip mine from being inside out. I just stitched the edge, then did a satin stitch around it again. the masks are really cute, especially with the fabric over the elastic.
cool idea, could funk it up and give to someone for a cute as Christmas present. Sweet as!
This was the only place I could find the template. Thank you
Thanks Love it.
After spending hours looking for such a pattern, im EXTREMLY pleased to find this one. Easy to understand and with a pattern. WONDERFUL!
good
it took me forever to find this, but it was so helpful after I did find it!
this is as nice as anything else i could find, and better directions!!
Very cute idea!
Easy to make and very cute, thank you!
I topstitched the whole thing after turning so I didn’t have to handstitch the turning hole.
Hi, I posted above also. I just made one with the felt I had.. I put rice in it.. weighs it down so no light gets in… you can also heat it up in the microwave, or cool it down in the freezer. NEAT! Thank you so much, now to put a band on it for my head
Really neat, thank you. I have some fleece material left from another project. I was thinking of making one with that. Also, what about combining this idea with the eye pillow.. fill it with some rice, will make it heavier, and warm or cool your eyes.
It’s really cute! Can’t wait to try cool patterns! I’m going to enjoy this..Thank you!
super cute!!!love it!love josie
It was exactly what I was looking for, the only place I could find a template!
i like the idea
Great project. makes nice gifts – just personalize with initials!!! Kids love it – grandma´s too
to get the template you need to go to the link that says “template”. It is under step 2
Perfect gift!
INSTRUCTION NUMBER 2 has a website copy that and you will get to the msn site then you have to sign in