
Get more details about this project
What you need
Recycled yellow t-shirt
scraps of red,orange,white and black felt for eyes.
toy filling/wadding
Instructions
What can you do with old t-shirts that are too worn to donate but too soft to throw away? Turn them into the cutest recycled chicken plushies that will absolutely steal the show at Easter. This is one of those feel-good projects I love—simple sewing, no fancy fabric shopping, and a finished result that’s charmingly imperfect in the best handmade way.
These little t-shirt chickens are soft, squishy, and full of personality, which makes them perfect for Easter baskets, spring décor, or a fun afternoon craft with kids. Because t-shirt fabric stretches and forgives, this project is beginner-friendly and great for using up those sentimental tees you just can’t part with. Think school shirts, old concert tees, or that one shirt everyone borrowed but never returned.
If you’re trying to sew more sustainably, clear out your drawers, or just want a quick Easter sewing project that doesn’t take itself too seriously, these recycled t-shirt chicken plushies tick all the boxes. They’re fast to make, impossible to mess up, and guaranteed to make people smile—especially when you make a whole little flock.
This adorable recycled plushie shows you how to upcycle an old t-shirt and create a little Easter Chicken. This Easter chicken can be given instead of chocolate as a gift or use him for Easter table centerpieces and Easter decoration.
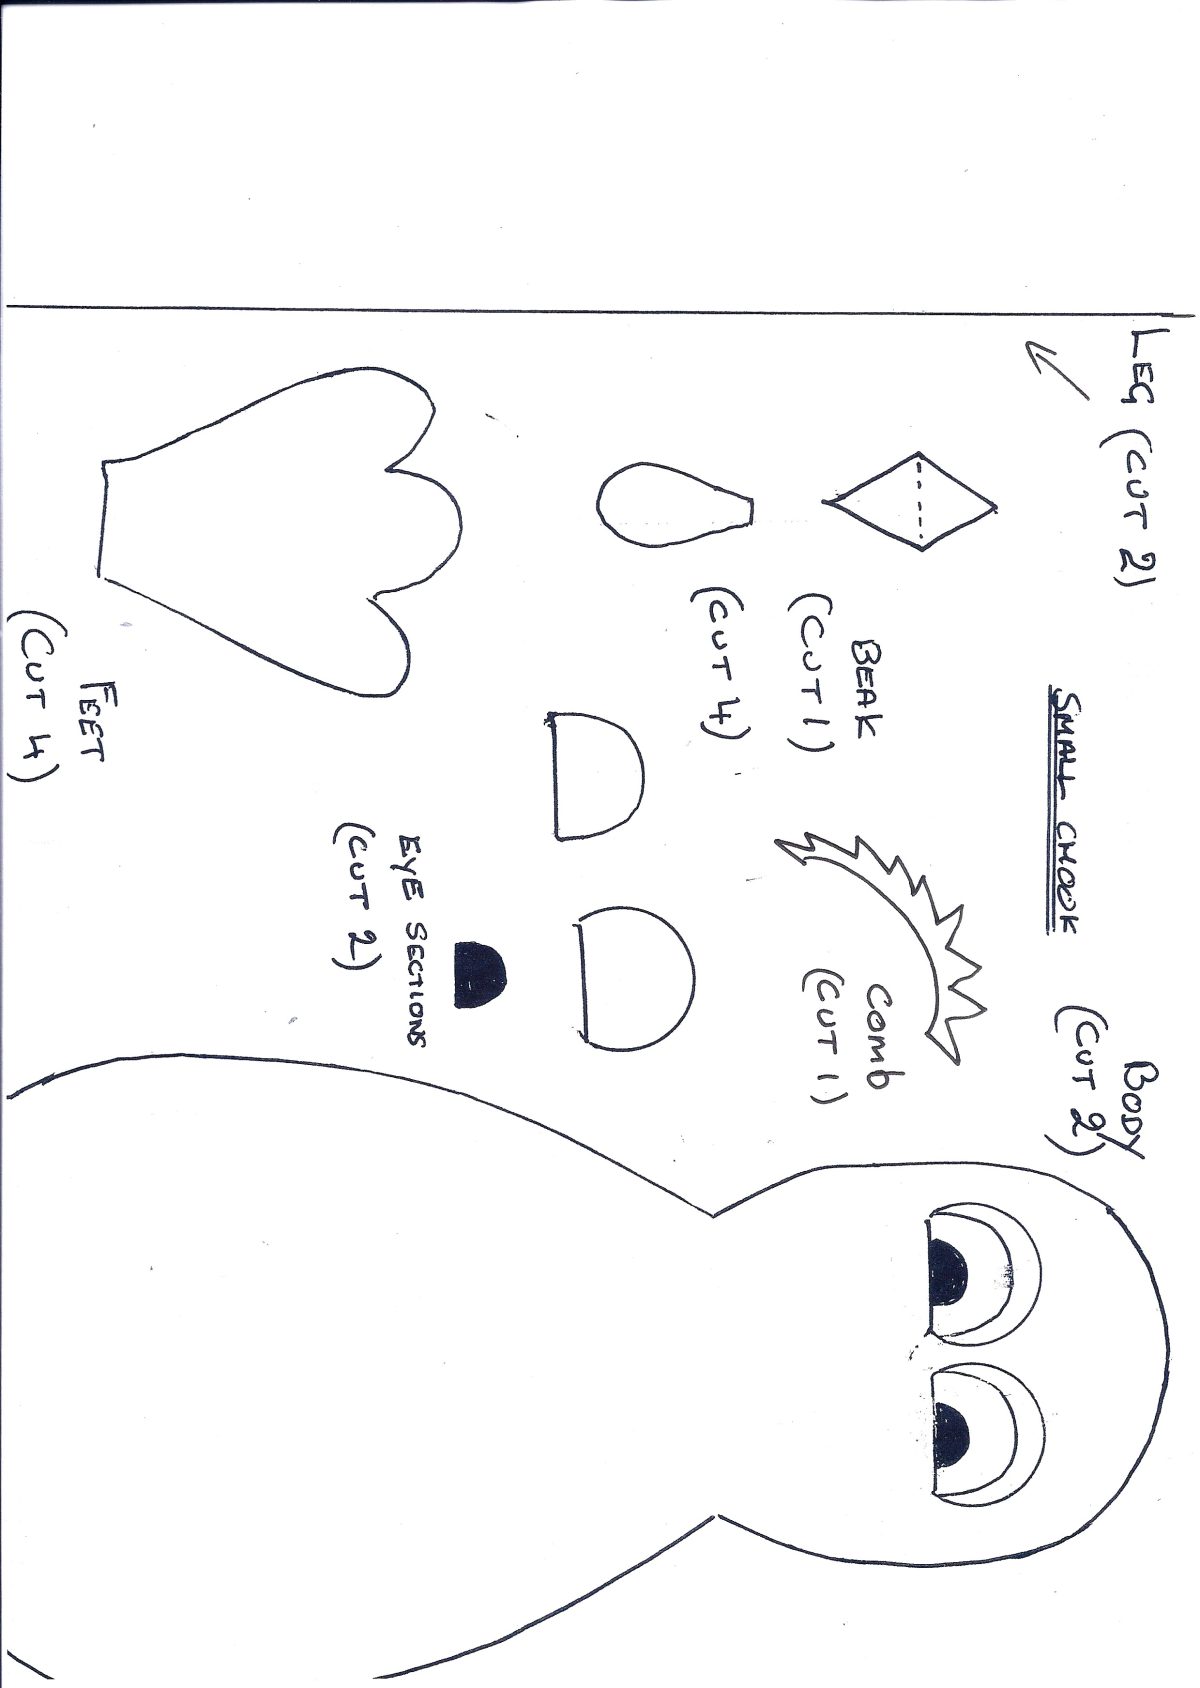
Print the pattern below, each page should fit flush onto an A4 sized paper but you can make yours as big or small as you like.
Sew the legs length ways this seam will run down the back.
Gather around the bottom and secure.
Fill with wadding .
Turn the body pieces so they are wrong side out and stitch them together ,remember to sew the legs in place as you go, making sure they are on the inside and both facing the same way leave a gap down one side so you can fill with toy Filling or Wadding , then hand stitch closed
Use your diagram for direction when you stitch the face on.
The beak is one piece folded in two and hand stitched to the head.,
The eyes are made up of two pieces first stitch the pieces together then hand stitch them to your chook head.
Sew your wattle under the beak.
Hand stitch the comb on the top of the head.


What do you think of this project? Let us know!