
Get more details about this project
What you need
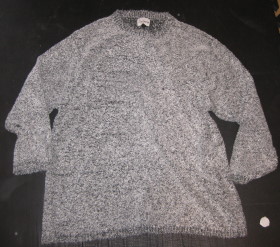
Old Jumper/pullover/ sweat shirt
4 Large Buttons for joints
2 teddy bear eyes or embroidery thread
scissors
needle and thread of sewing machine
toy filling/wadding
Teddy’s jumper is optional
Size 18 inch when complete
Instructions
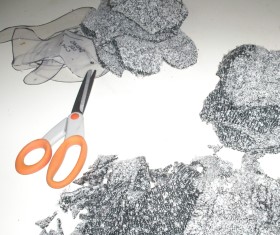
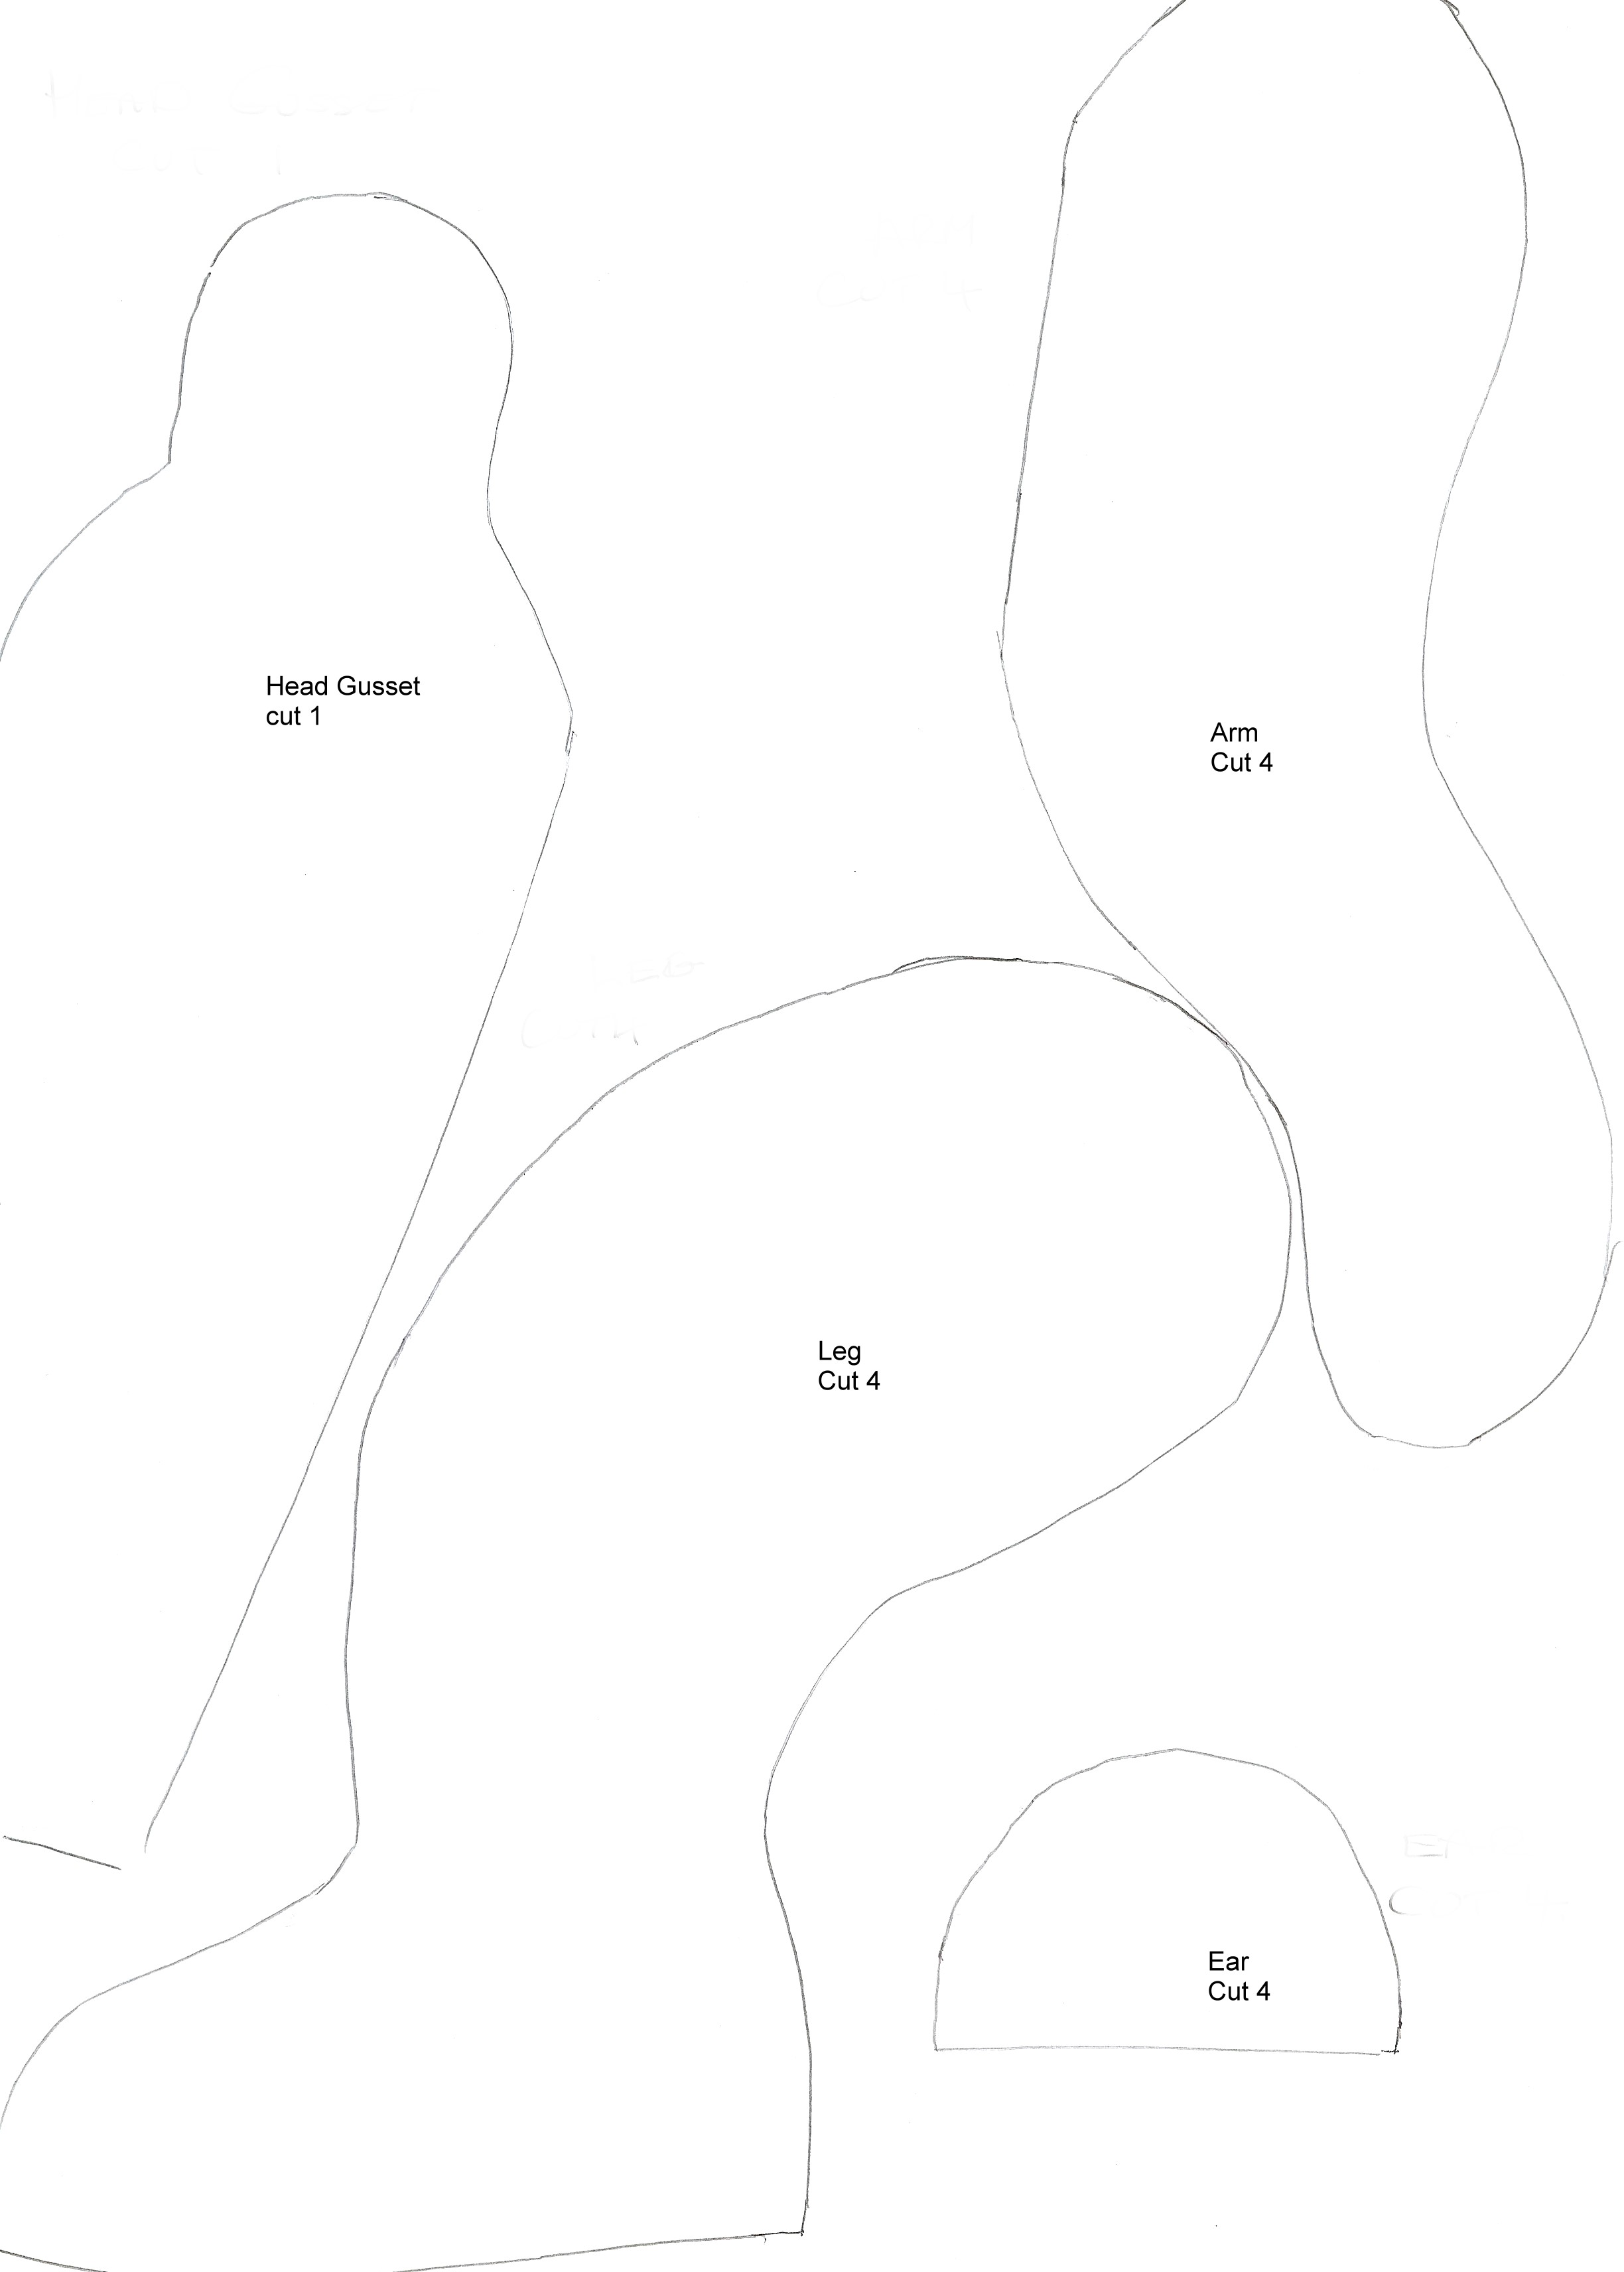
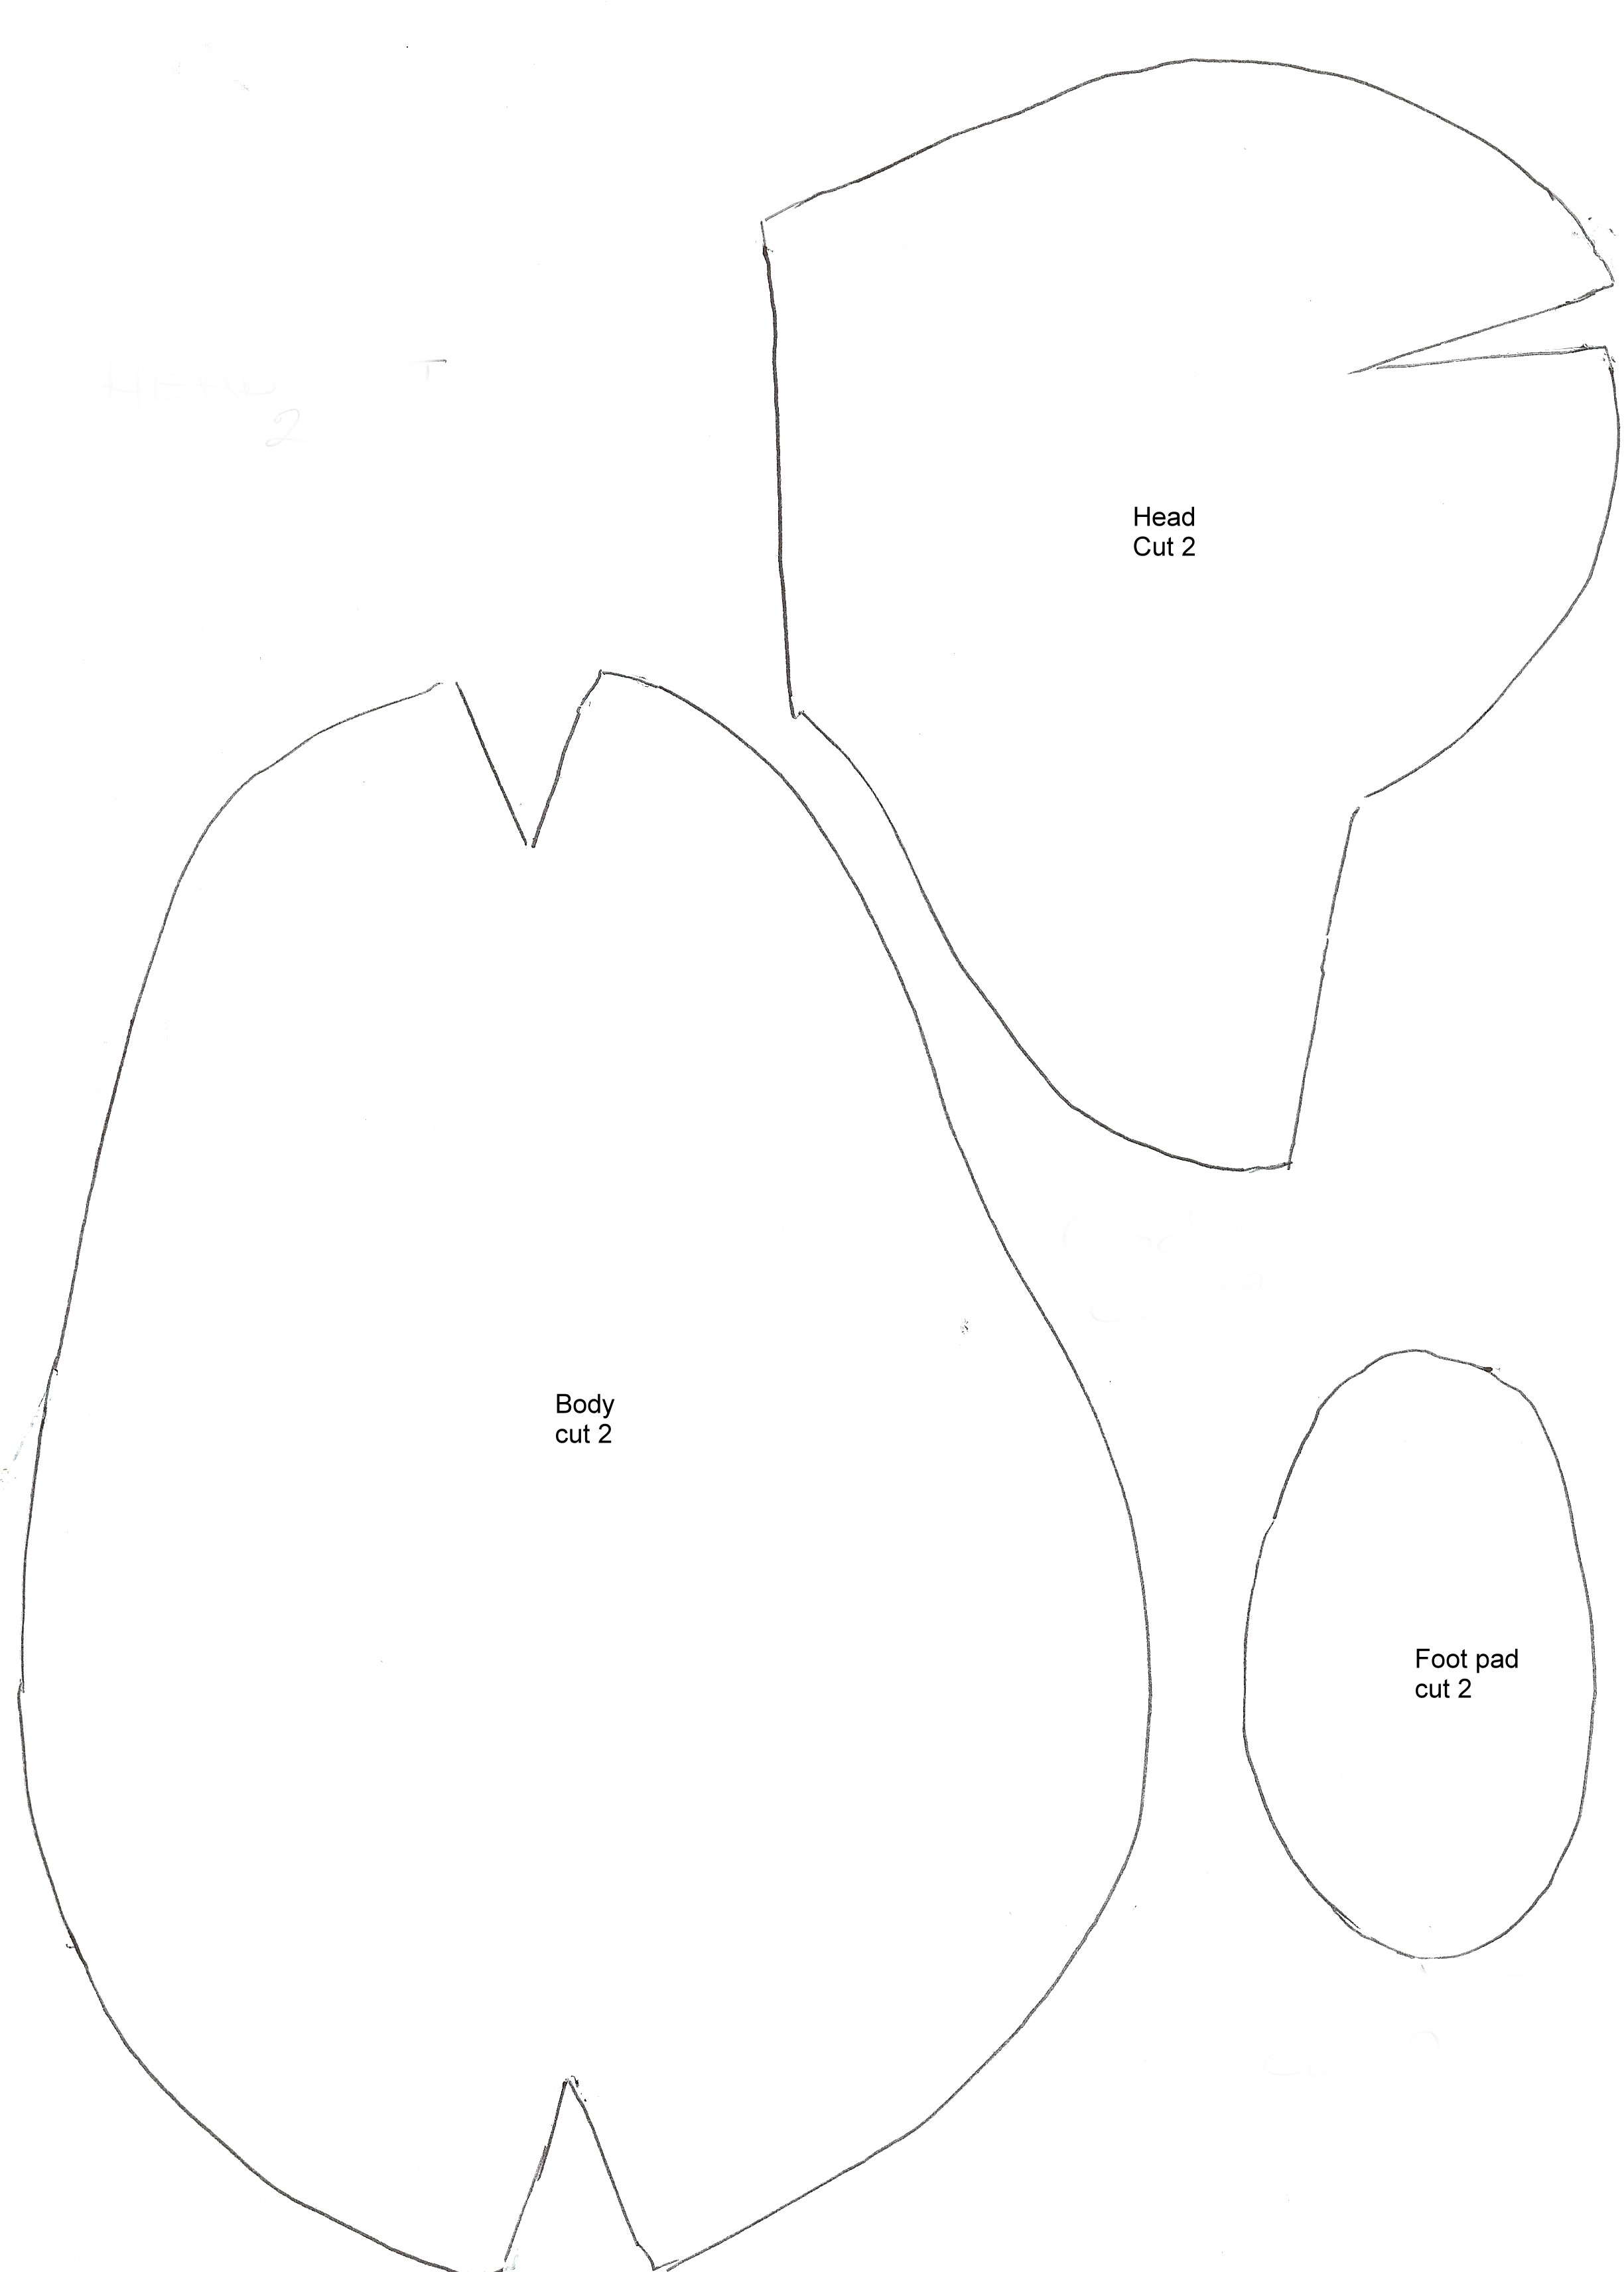
Start by printing out these patterns onto A4 sized paper.
Prepare your sweater by cutting the seams to create a single layer of fabric.
Cut out each pattern piece and lay it down onto your sweater. Cut out each piece.
Sew the body first. Sew the bottom darts on both sides and then sew the two pieces together. Leave an opening at the top for filling the body.
Legs
Sew two pieces together and leave an opening at the top above the fold , for filling, sew the foot pad into place.
Arms
Sew the two pieces together, leave an opening at the top back edge for filling.
Ears
Sew the two pieces together and leave an opening at the bottom, turn them and sew the bottom by hand.
Head
Sew Gusset to one side of the head, the rounded end goes to the nose. It may be easier if you pin this in place so you get both sides the same.
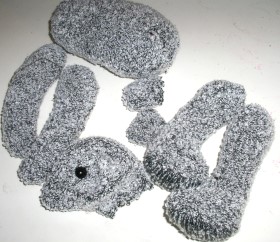
Before you fill the head, clip 2 teddy bear safety eyes into place. They should be positioned at the beginning of the snout.
Fill and place ears into position, attach to the head with a blanket stitch, making sure they are secure.
Fill all remaining parts, sew up openings and attach to the body each part with strong cotton and a button for a joint effect.
All done!


Need help! Do I use interfacing if I am making this pattern from a cashmere sweater?
Can’t get it to print…grrr!
Hi Jo – what issue are you having?
Couldnt get pattern to print onto standard letter size paper A4
Hi Kat – did you login and try the print button?
love this teddy bear
Thanks for pattern! Clever Idea!
Try Ctrl + P
Like the idea of this but I can’t get the patterns toprint on A4 either. Might be easier if they were saved as pdf rather than jpg?
I can’t get the patterns to print onto A4 paper. Does anyone have any tips on how to get it printed?
I’ll have to try this!