
Get more details about this project
What you need
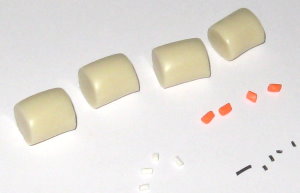
White polymer clay (for the ghost shape)
Small piece of orange polymer clay (for the nose)
Black and white polymer clay or mini googly eyes (for the eyes)
Acrylic rolling pin or smooth surface for shaping
Craft knife or clay cutting tool
Jewelry pliers (if turning into charms)
Jump rings and bracelet/necklace chains (optional)
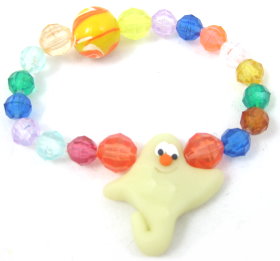
Assorted colorful beads (for bracelet or necklace assembly)
Elastic thread or jewelry wire
Oven (to bake polymer clay according to package instructions)
Instructions
This halloween craft project shows you how to make a halloween ghost charm or pendant using polymer or fimo clay.
Oven for baking – it is recommended to use a clay – only oven (toaster oven). You can also enclose your project inside two baking pans; clamp closed & bake in regular oven. Remove once cooled.
Condition a small amount of each color of clay until soft and pliable by rolling and squeezing in your hands.
You will need more glow-in-the-dark & very little of the others. Test to see if it cracks when you bend it – that means it needs more conditioning!
Roll out an even log of each color & divide it in half with your knife. Keep dividing it until you have the size you desire. This is the best way to get evenly sized pieces.
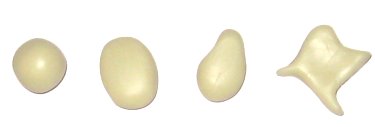
Roll the GITD clay into a ball & flatten slightly.
Pinch one end to make the head.
Now pinch the arms and tail into desired shape.
Now is a good time to make your hole or insert your wire – so as not to squish your details that will follow. Make a hole by gently twisting the pin or toothpick as you apply gentle pressure.
Roll 2 tiny balls/ ovals of white for the eyes (or just black) and 2 tinier balls of black for the pupils, if you like. Press them into place.
Roll 1 tiny ball of orange for the nose and press into place..
Using a pin or toothpick, scratch a mouth onto the face – you can also use a piece of clay, if you choose & press it on. Experiment with different looks.
Bake according to the manufacturer’s directions & let cool.
Glaze if desired. I use varathane – found in most hardware stores. For small projects, use the clay manufacturer’s glaze. The bottles are smaller & more affordable!
CREATE something fun with your beads or set them out as tiny decorations. These make fun Halloween bracelets, necklaces or pendants for trick-or-treating!!!!


umm its cuuuuuuuute for children but not 4 me sozzzzy