
Get more details about this project
What you need
1/2 yard of polar fleece or woolen felt
2 buttons for eyes
1/2 inch ribbon for bow
Toy filling
2 skeins of embroider thread
Instructions
This Standing Dog Plushie free sewing pattern is a sweet handmade soft toy project for anyone who loves sewing plush animals, puppy toys, and cuddly keepsakes. Made with polar fleece or wool felt, button eyes, embroidery thread, ribbon, and toy filling, this standing puppy plushie has floppy ears, soft feet, and a charming handmade finish.
The pattern can be stitched by hand using embroidery thread and blanket stitch, or sewn on a machine if you prefer a quicker finish. It makes a lovely baby snuggle toy, nursery decoration, handmade gift, or craft stall softie, and you can easily customise it with different fleece colours, printed fabrics, ribbons, or embroidered details.
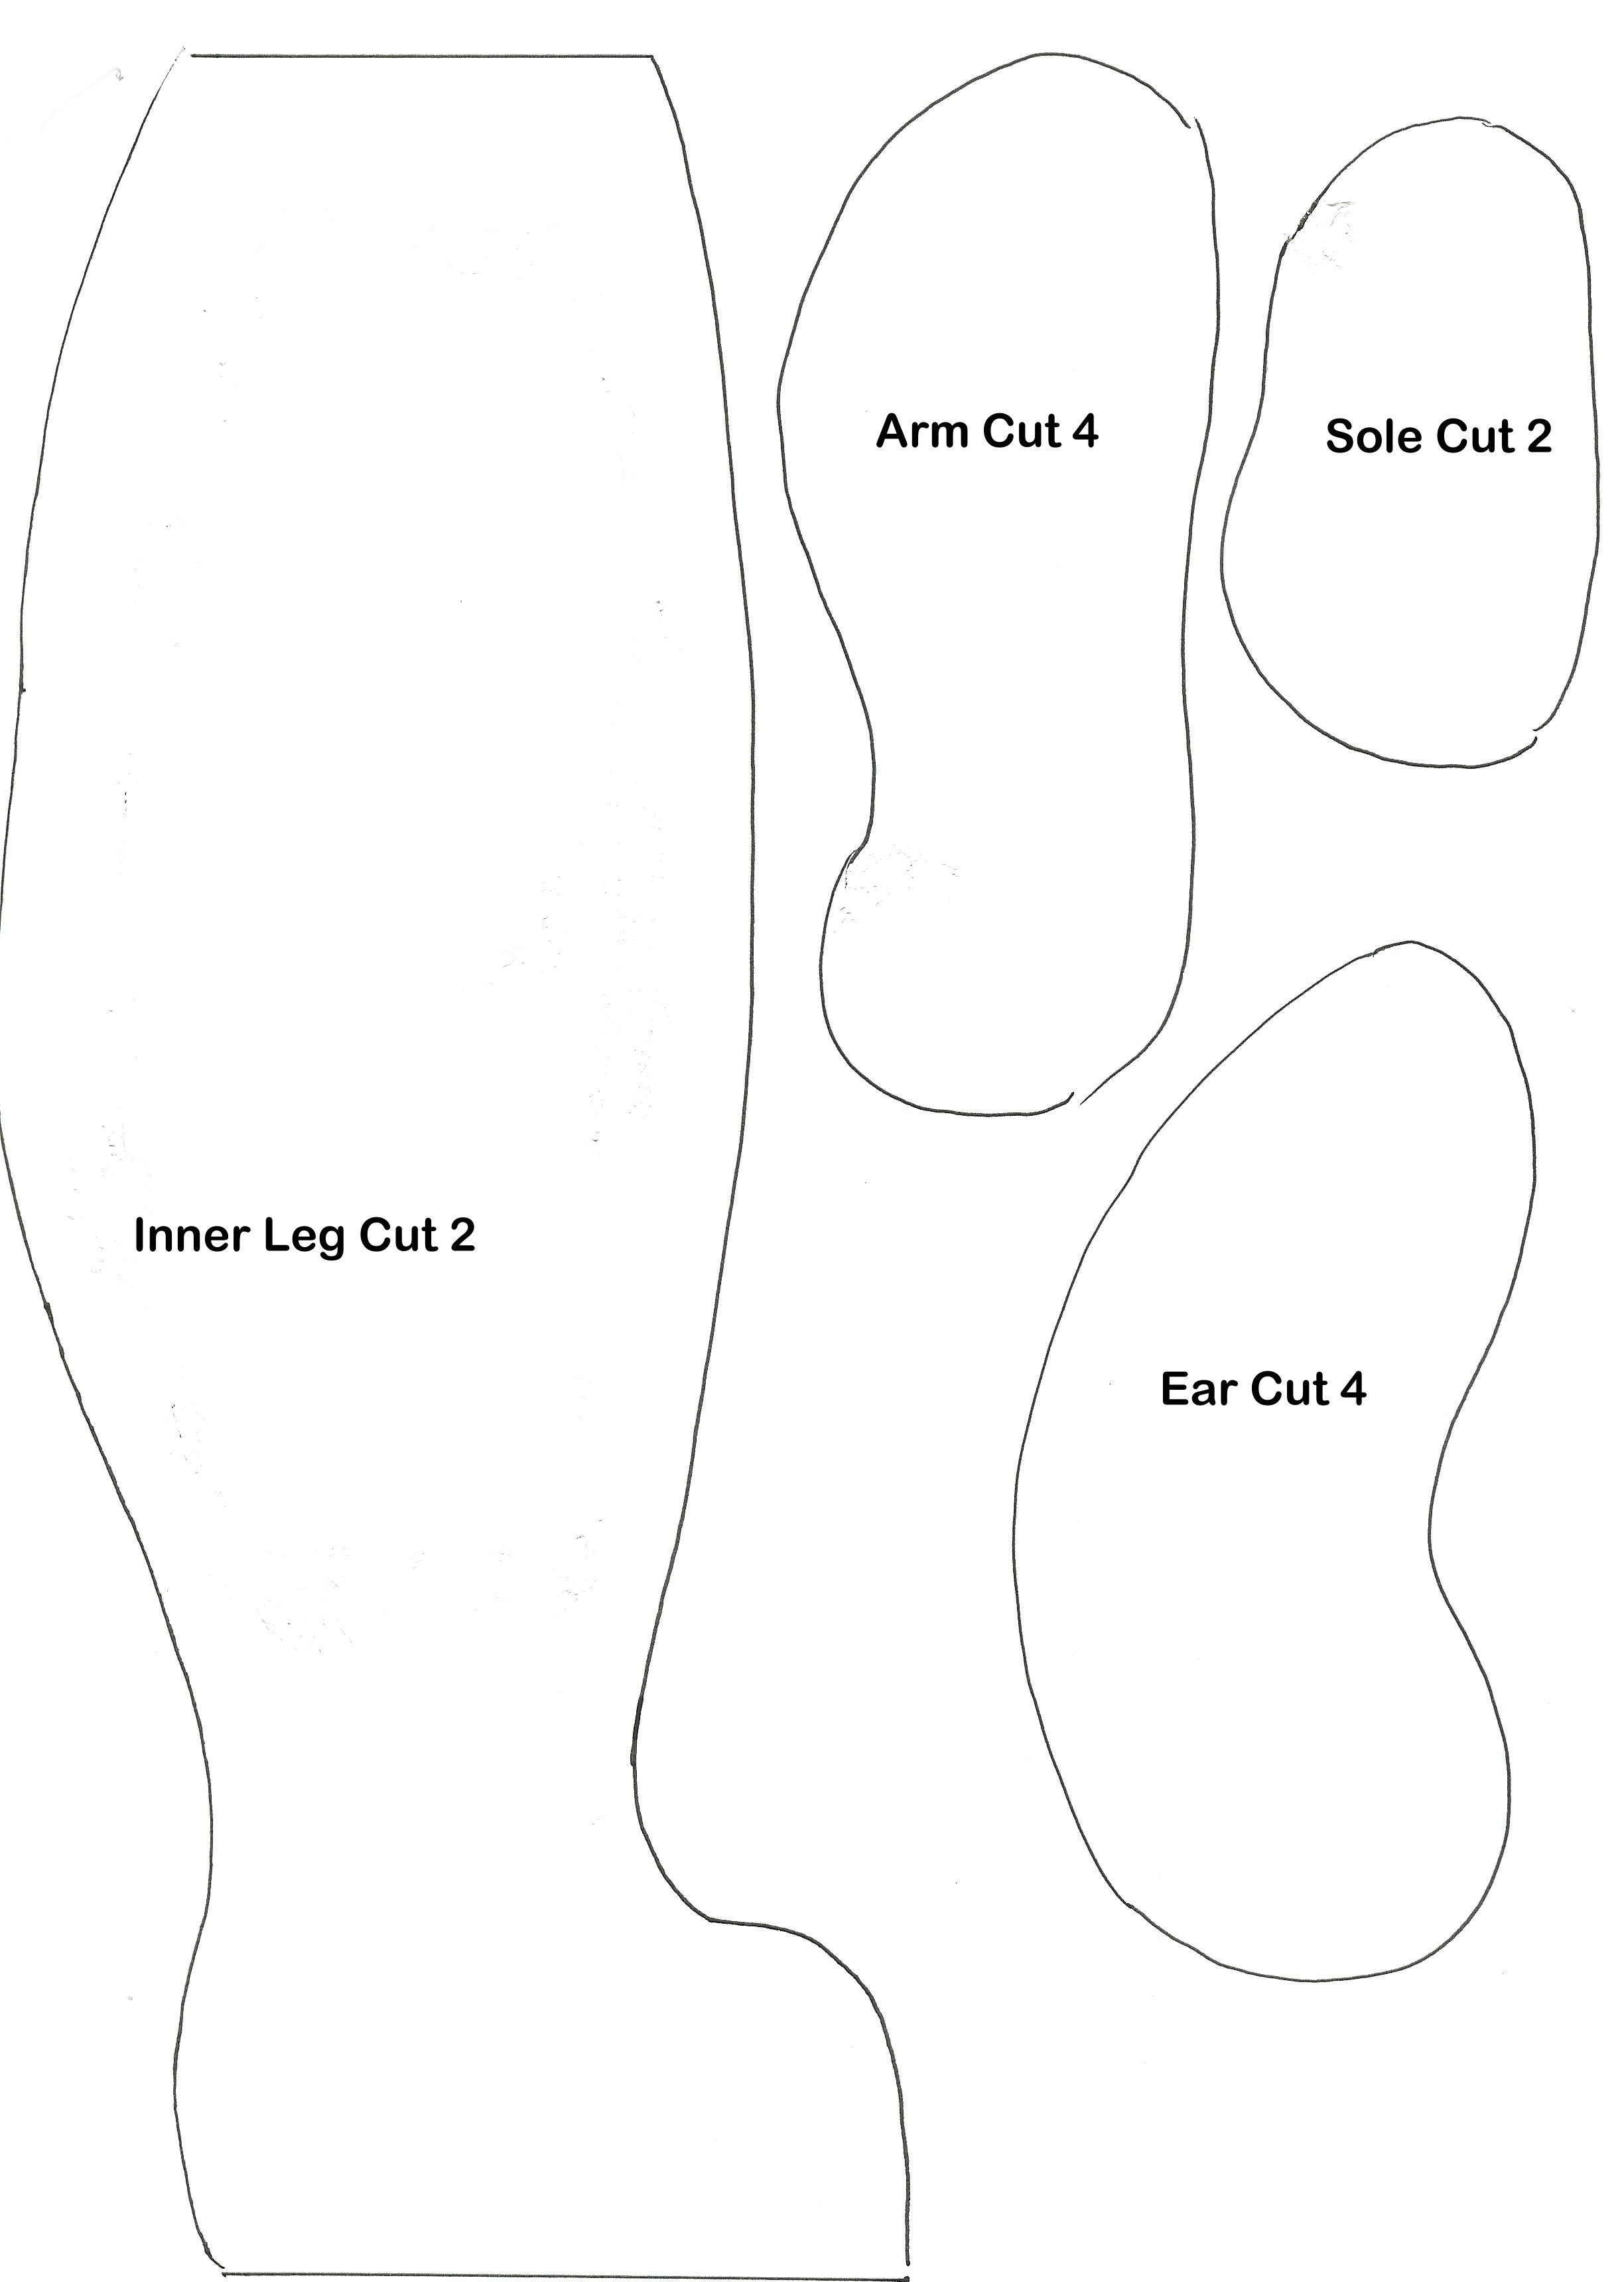
Using the pattern below print off the pattern sheets to fit onto an A4 sized paper.
Cut out all your pattern pieces following the pattern sheets.
This pattern is sewn together using embroidery thread in a blanket stitch finish. You could also sew this pattern together using a sewing machine.
Sew inner leg to the body piece on both legs.
Sew down the back seam.
Sew in the tummy gusset.
Sew soles to the bottom of the feet.
Assemble the head
Stitch the head gusset to both sides of the head, the gusset goes from the nose to the back of the neck.
Sew the button eyes into place.
Stitch the ears into place.
Stitch the head to the body leaving a gap for filling.
Using Toy Filling or Wadding stuff the dog to suit your plumpness. Finish off by sewing the bottom closed.
All done!


its cute but hard
cute!
Lovely toy. I am confused with the patt tho. There doesn’t seem to be a body piece and do you need 4 leg pieces? Instructions say: Sew inner leg to the body piece on both legs. I can’t find the body piece to sew the inner legs to and what are the outer legs made from? Is it just me being dumb?
i have to make this 🙂