
Get more details about this project
What you need
Various felts
toy filling/wadding
embroidery threads
size 9″ (25cm)
Instructions
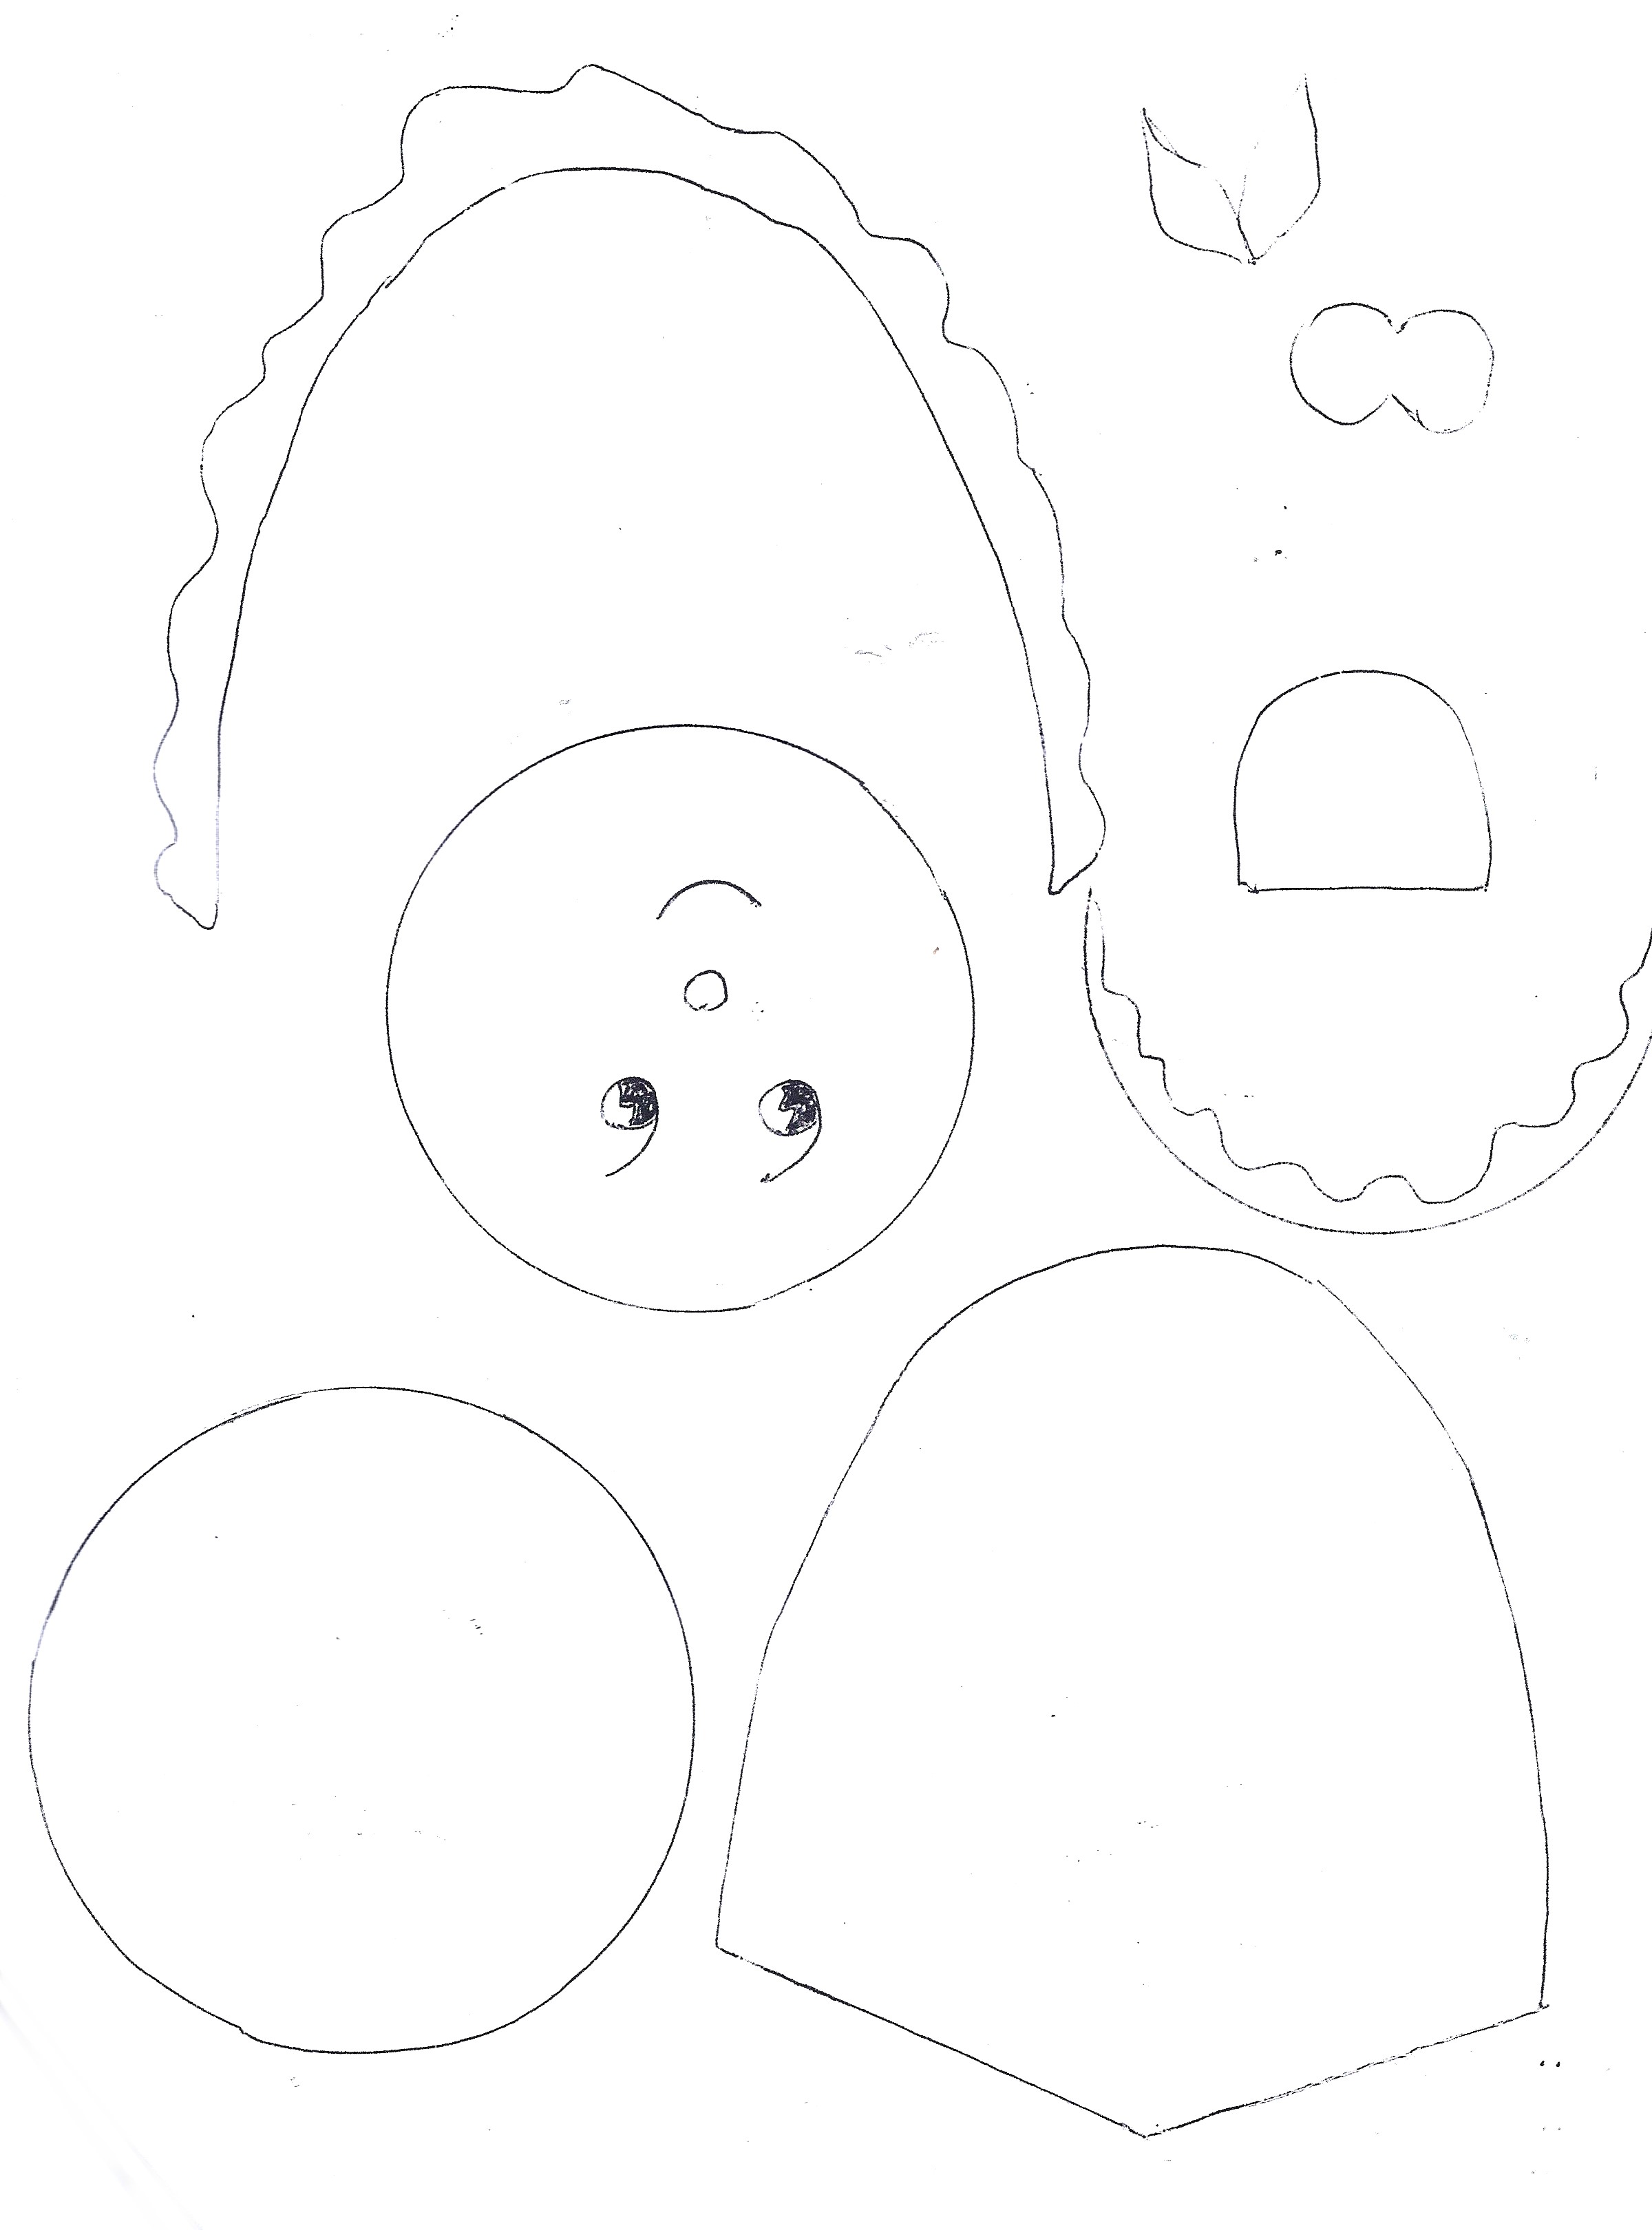
Step 1: Use the patterns below.
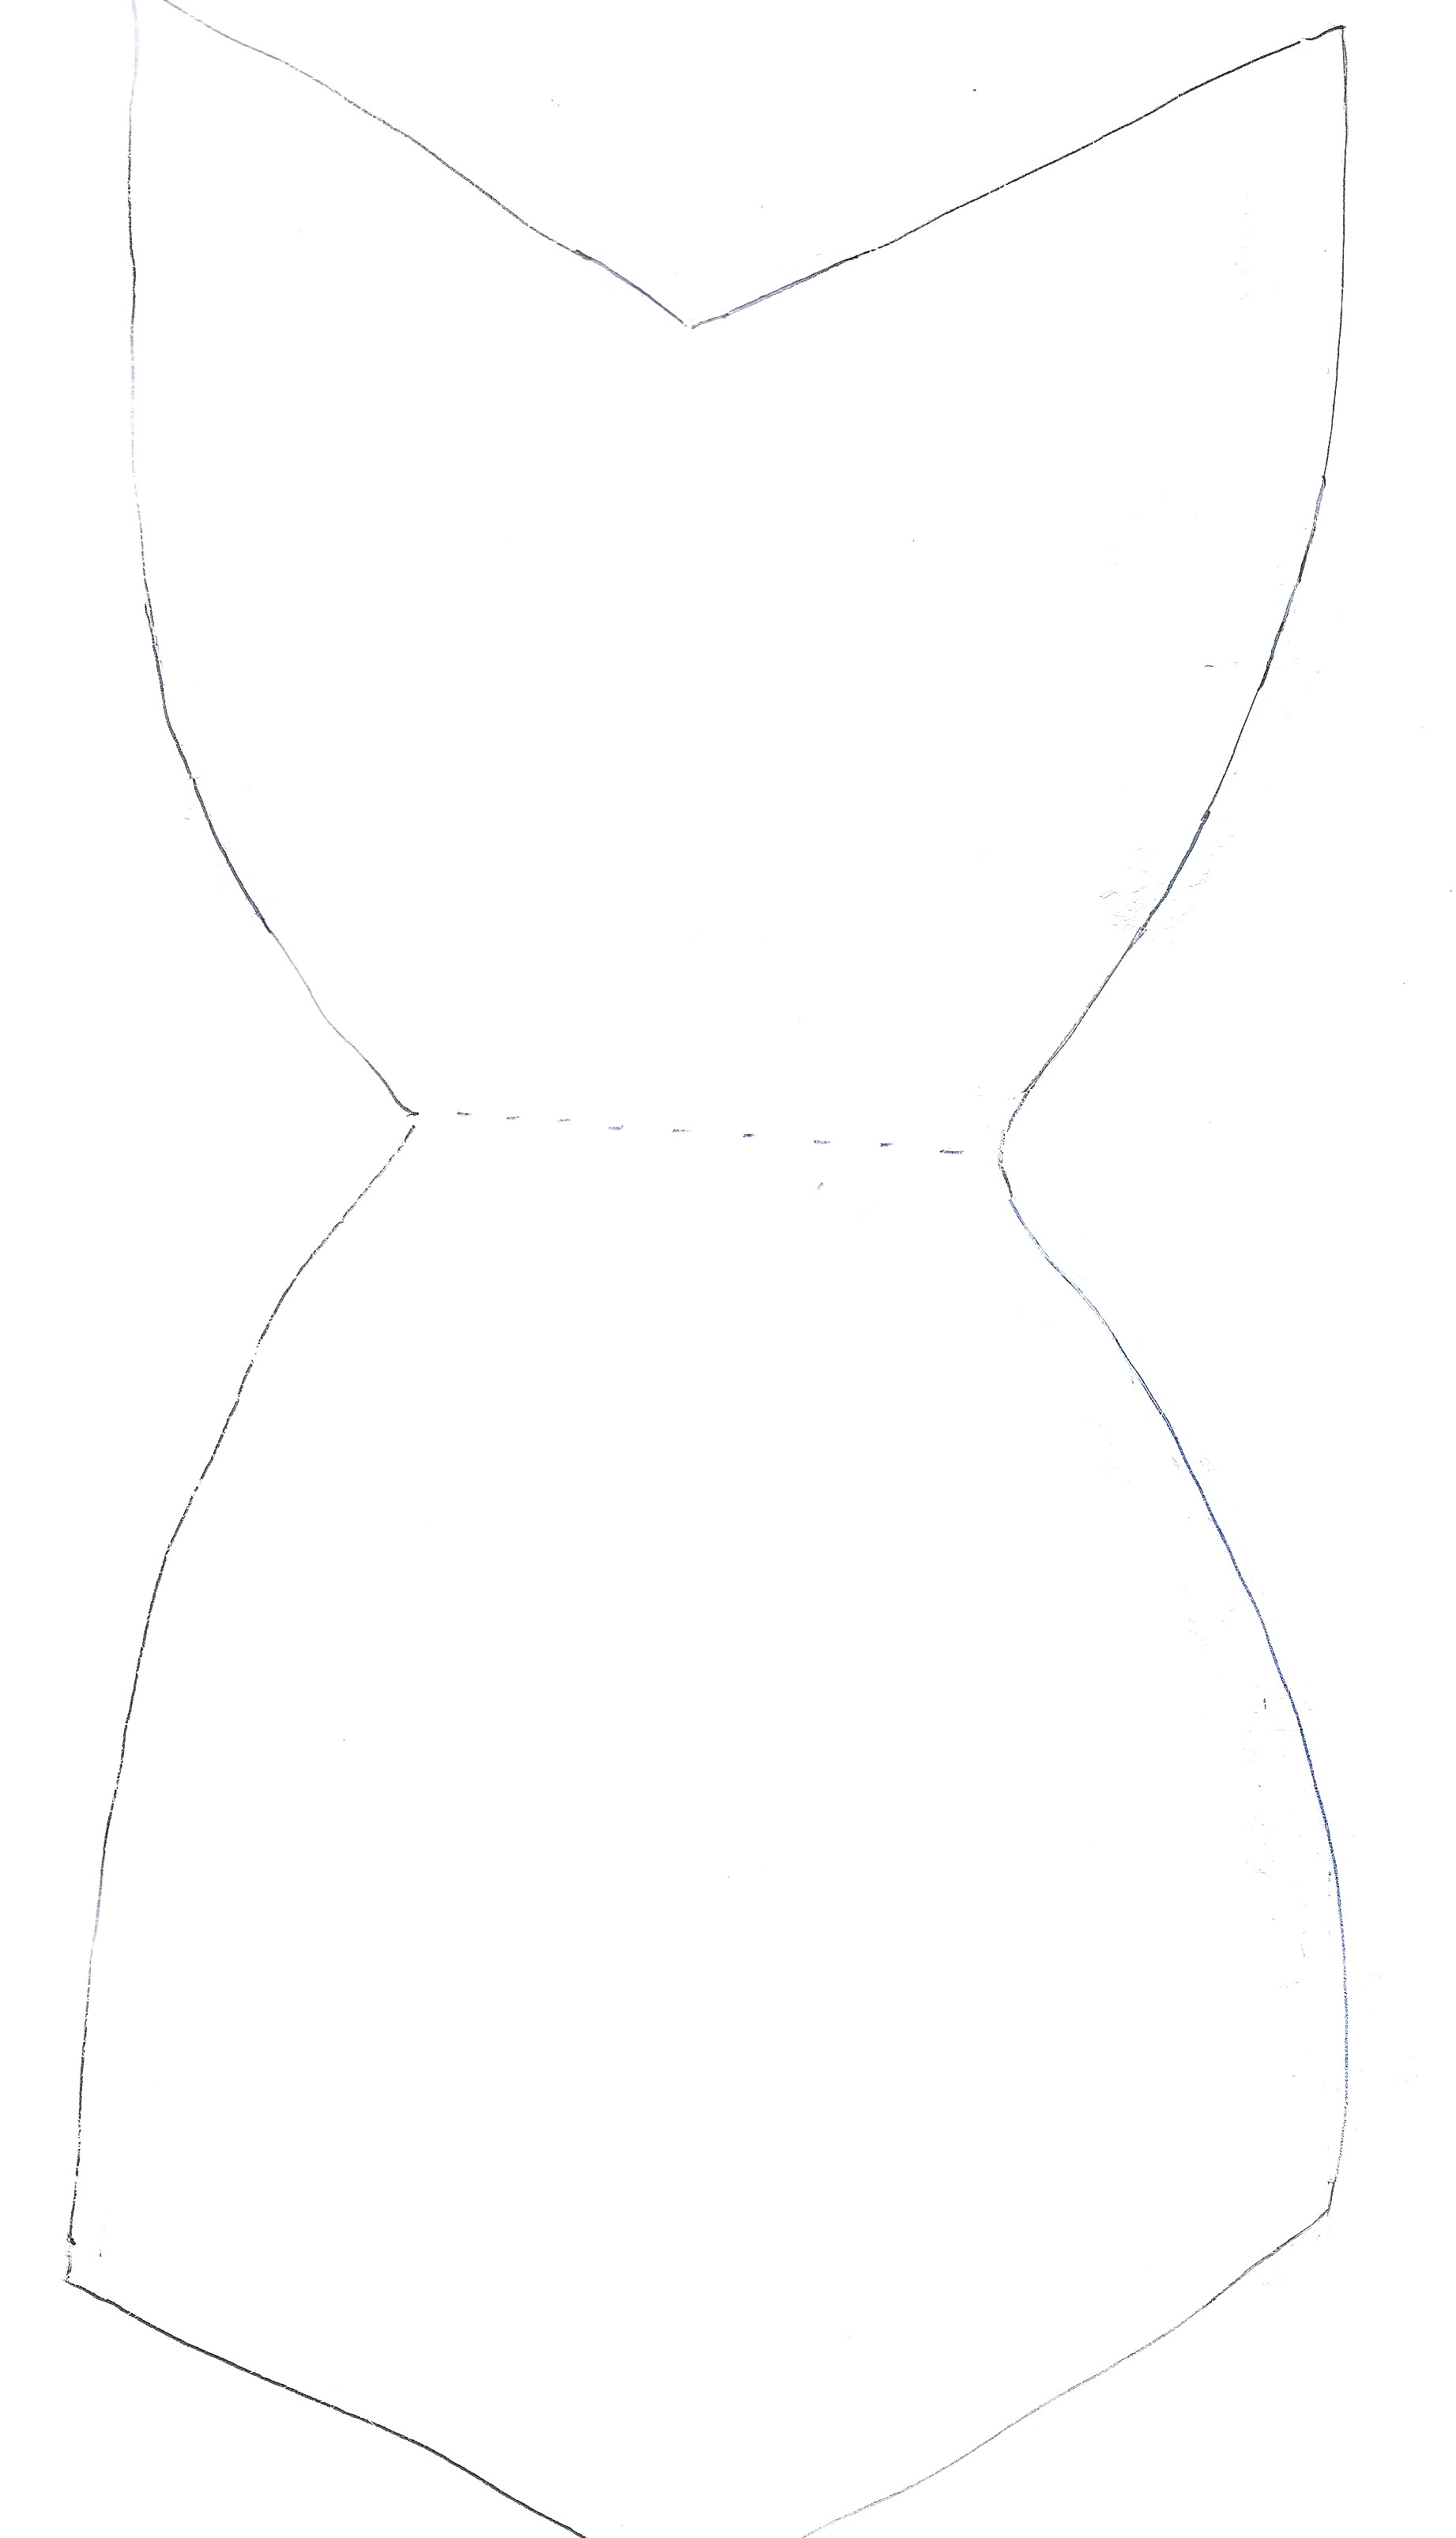
Step 2: Cut 2 full body pieces in your selected color (we used yellow) and stitch around around the edges. Fill then stitch on the base.
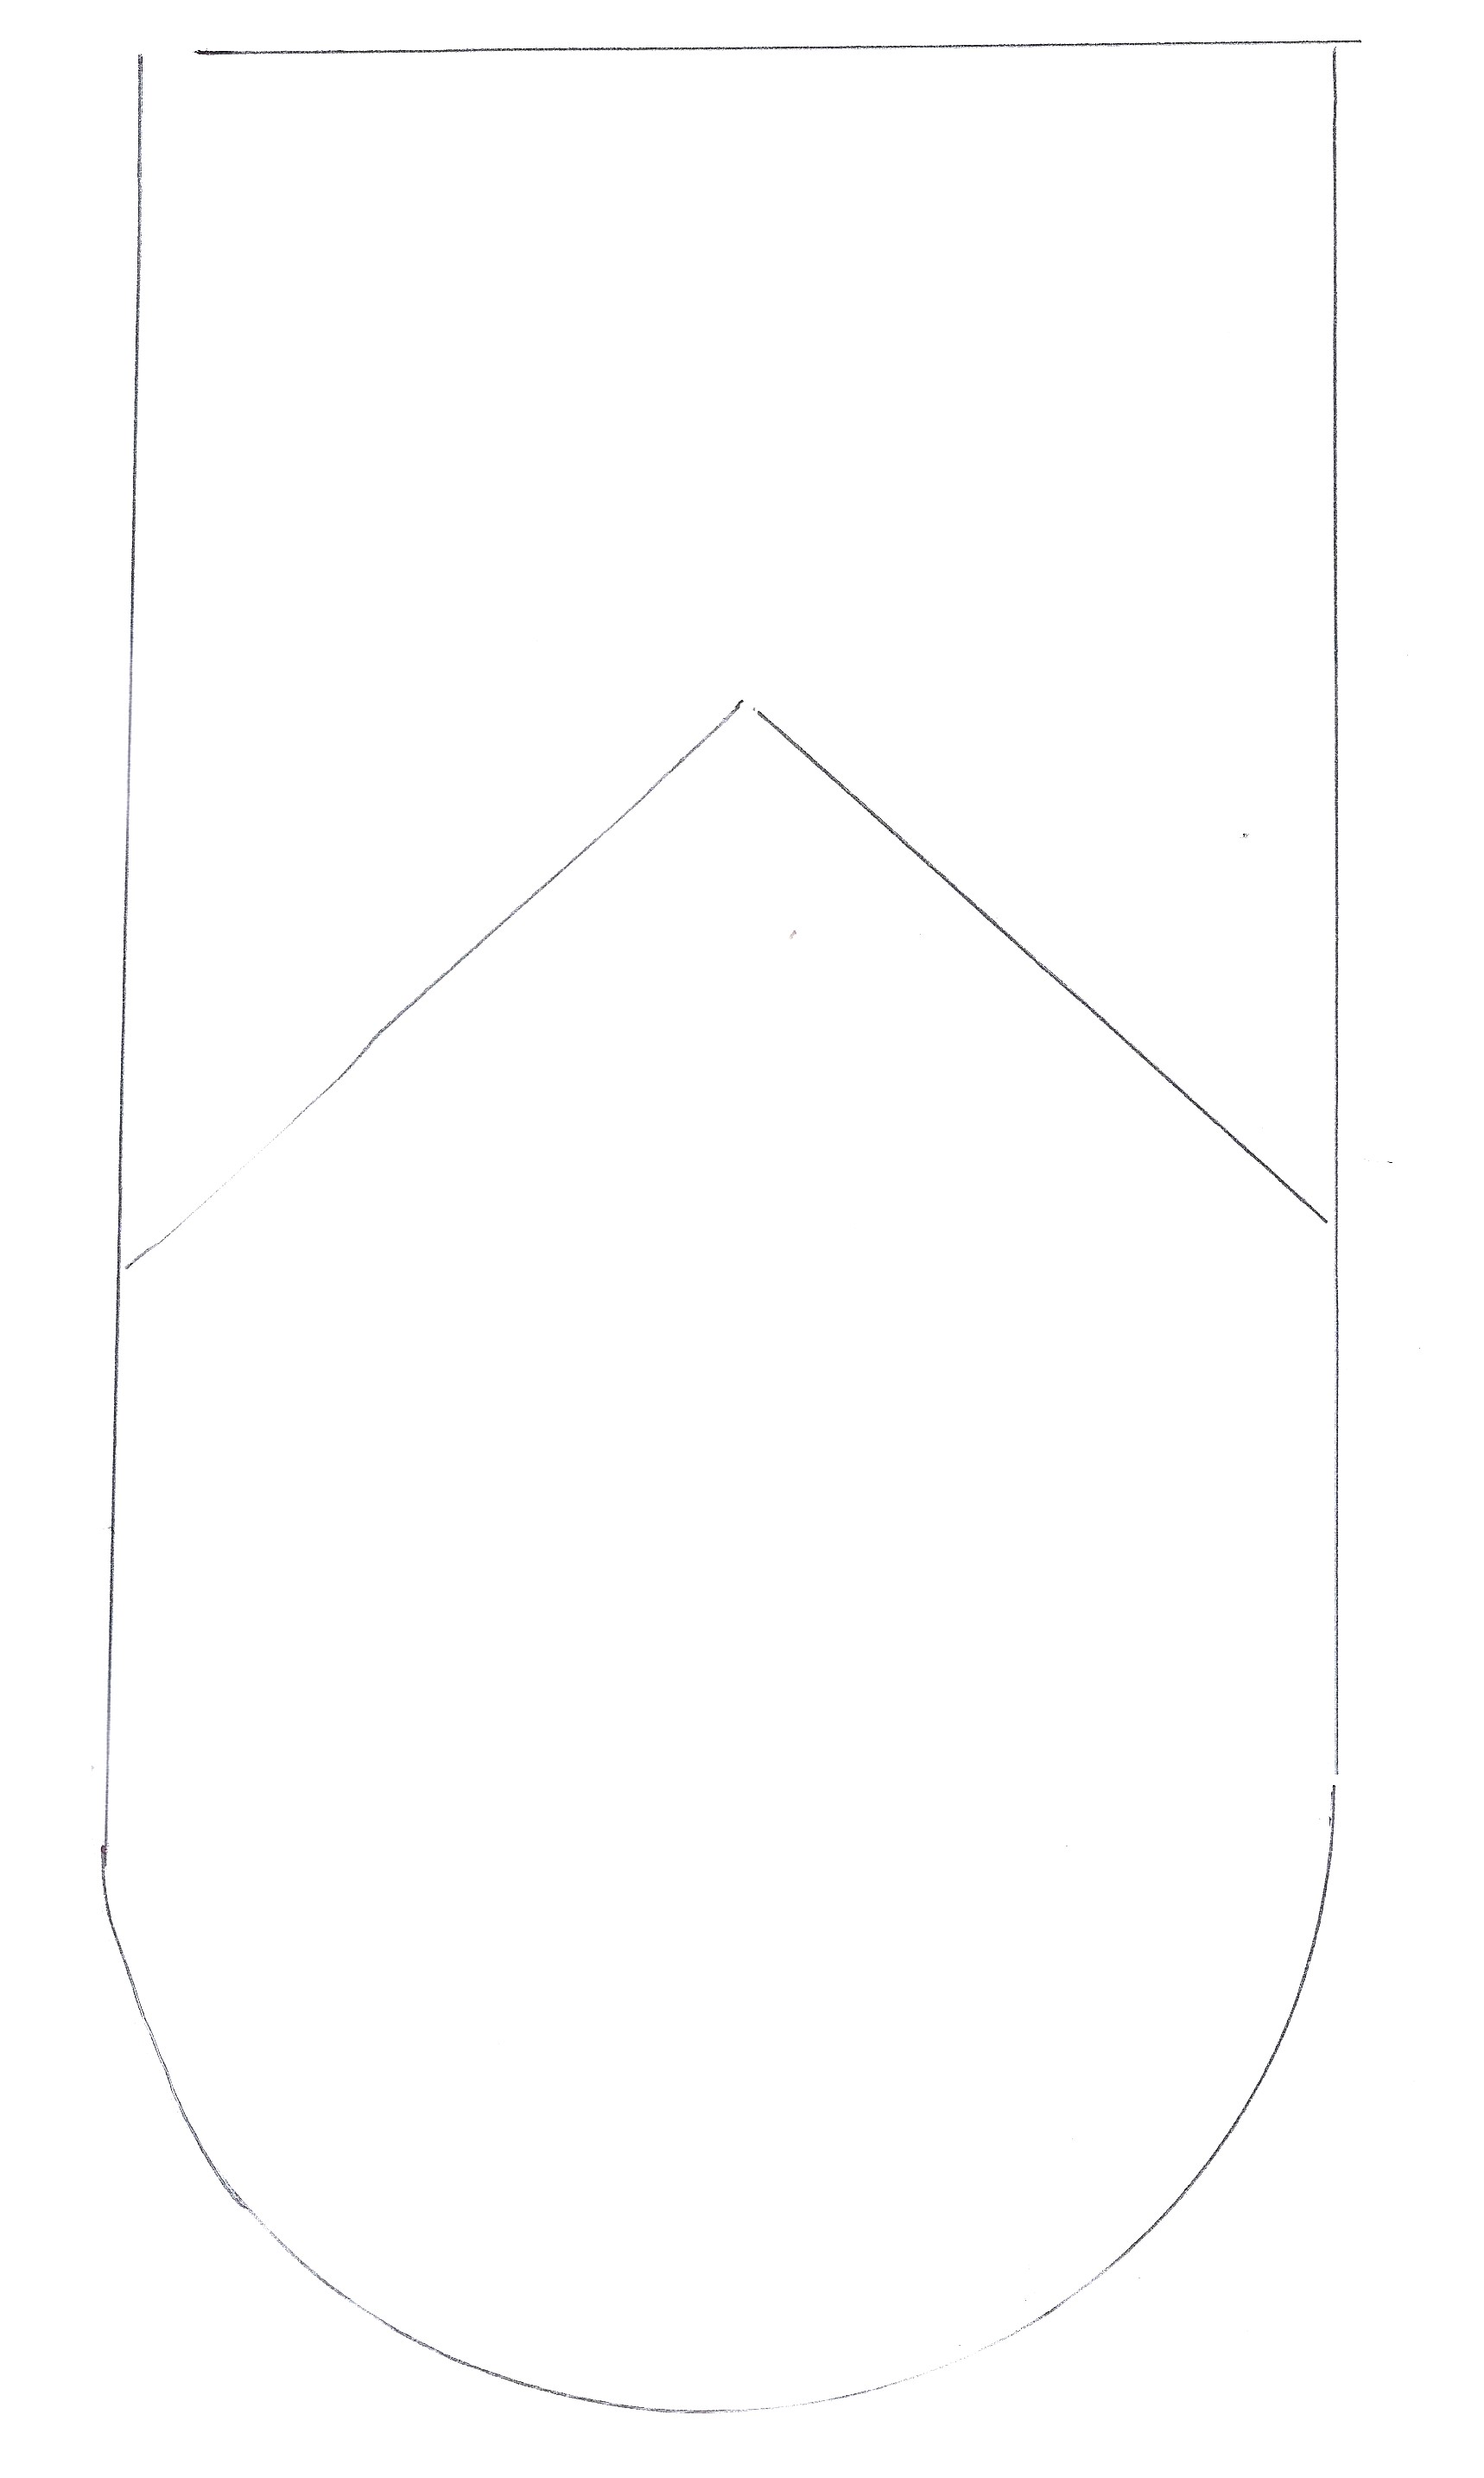
Step 3: Stitch the scarf piece into position and leave it open at the front at this stage. The dotted line goes at the top of the head.
Step 4: Stitch the apron into place and tuck it under the scarf V section you left open.
Step 5: Secure the scarf and apron at the same time with stitches.
Step 6: Next add the lilac lace edging to the apron by stitching into place.
Step 7: Stitch the pocket on.
Step 8: Stitch the face piece into position and embroider the face.
Step 9: Stitch the hair onto the head and finish off by sewing the scarf bow into position under the chin.


OMG SOOOOOOOOOOOOOOOOOO CUTE!!!!!!!!!!!!!!!!!!!!!!!!!!1im going 2 make 1 right now!!!!!!!!!!!!!!!!!!!!