
Get more details about this project
What you need
Felt
Embroidery threads
Needle and Thread
Toy Filling/wadding
Embellishment ribbons
Instructions
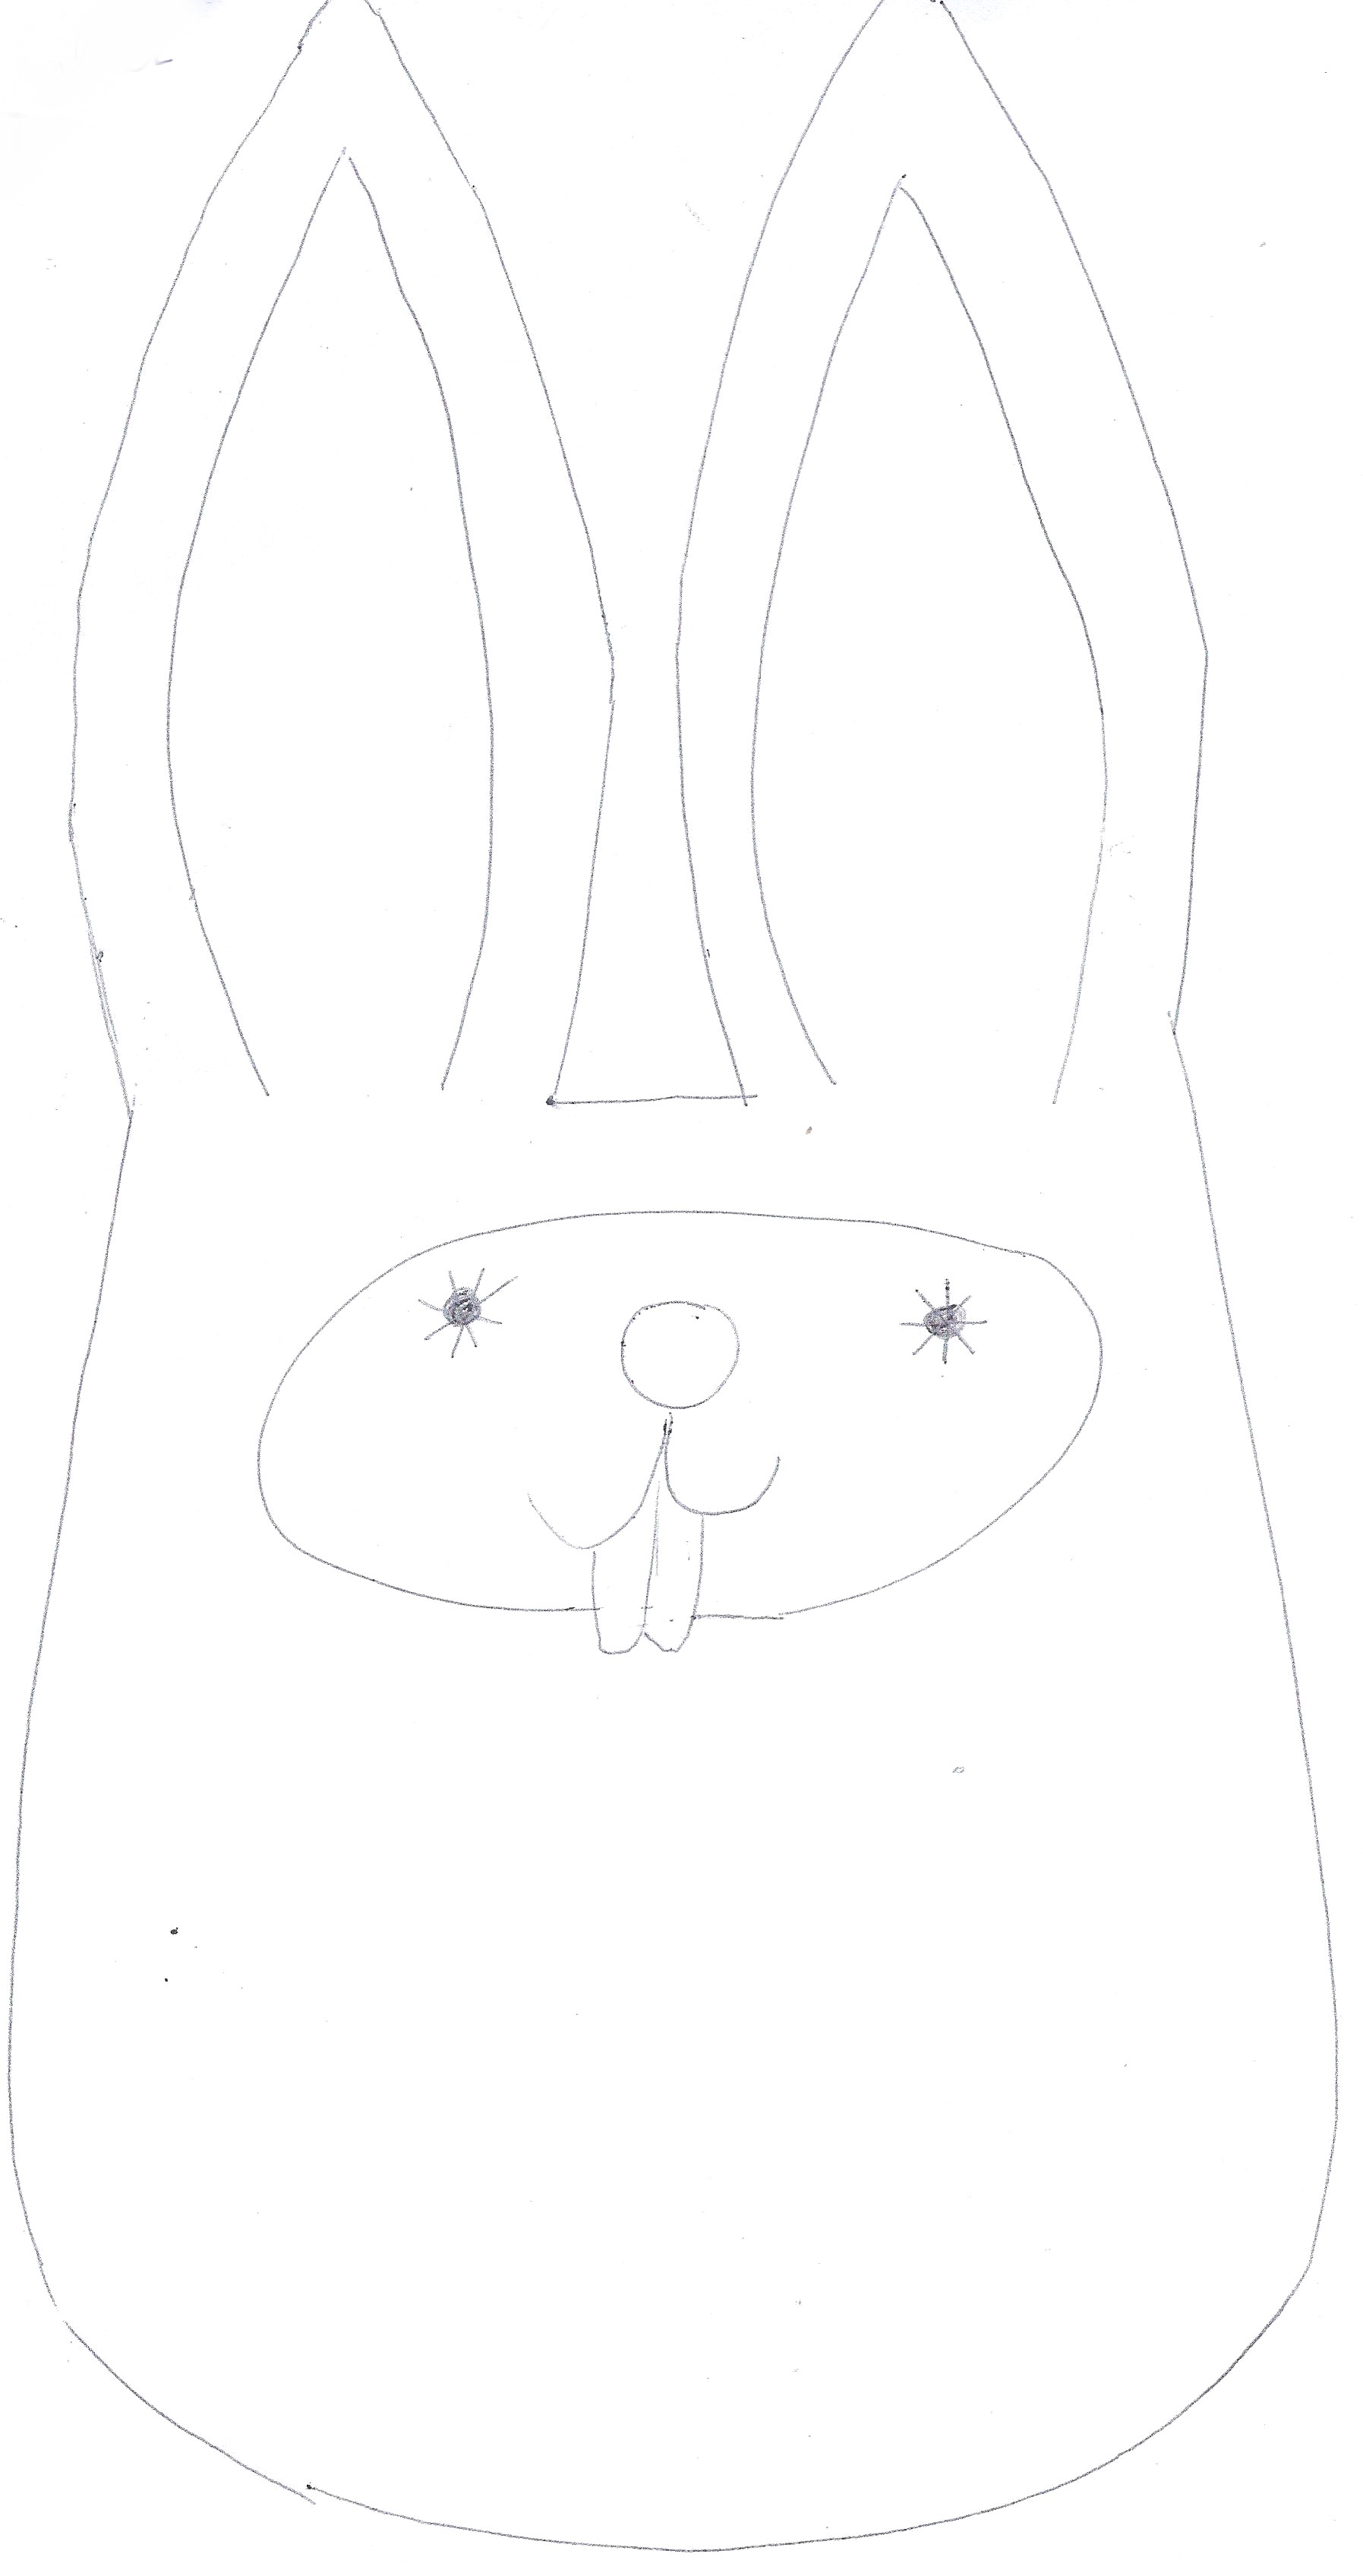
Use the following pattern to create your 11 inch doll.
Cut 2 body pieces
Cut 1 face piece in white
Cut 1 nose in black
Cut 2 ear inserts in white
Cut teeth in white
Sew the two body pieces together and leave the top open between the ears for filling.
Now fill slightly with wadding and stitch up the gap between the ears.
Position the face piece and stitch around it. You can use a dab of glue or some straight pins to hold it into place whilst you stitch around it .
Embroider the black section and place the teeth underneath.
Stitch into place the ear section (inner ear).
Embroider the eyes.
The nose can either be embroidered or you can use a felt piece.


aww, perfect for my scrap felt.
im going to make these for my cousins for christmas. thanks for the idea!
this is absolutely adorable! i’m deffinitely going to make this as soon as i get stuffing. thank you!