
Get more details about this project
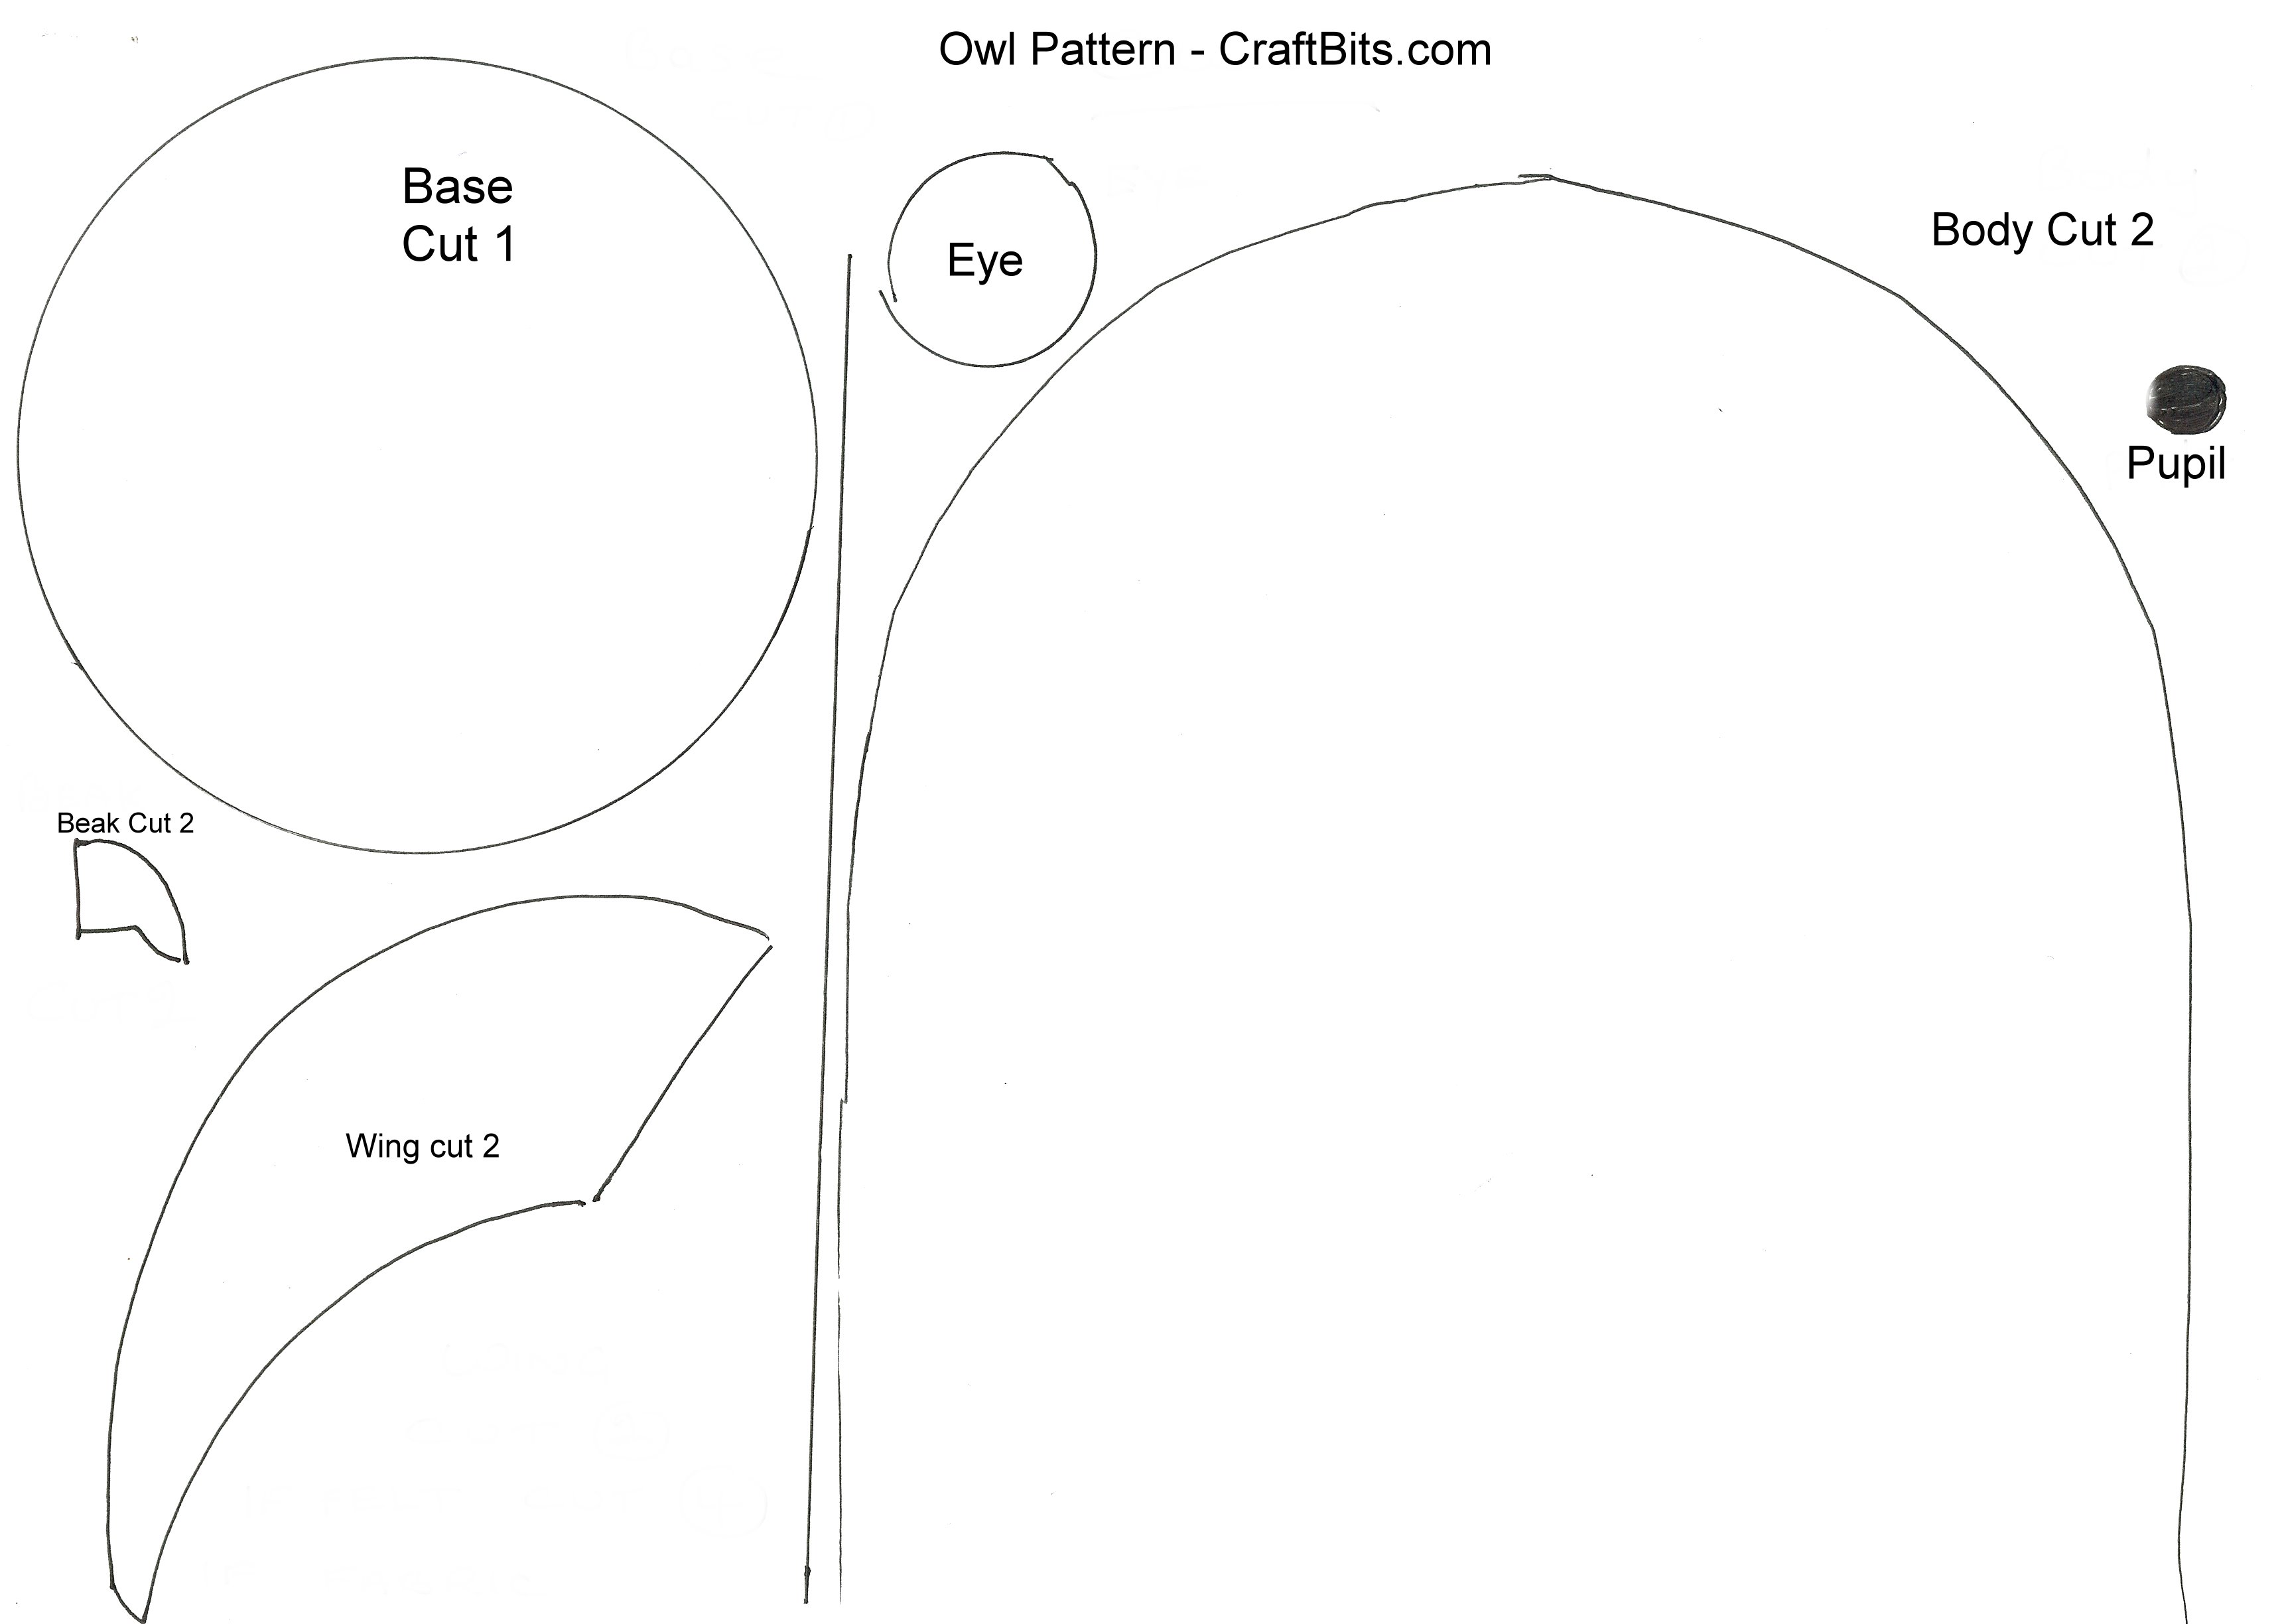
What you need
Floral Fabric
White & Black felt for eyes
Matching felt color for wings and nose
Toy stuffing
Instructions
It should be re-sized to fit onto an A4 sized paper for a 10 inch (25cm) owl but you can re-size it to suit your needs.
If using fabric for wings sew 2 pieces together leaving a gap for turning inside out. Repeat for the 2nd wing. If using felt then cut one win for each side.
With the right side of fabric facing out lay the wings in place so they come inside across the body and secure with pins.
Now lay the second piece of body on top and pin into place before sewing.
With wings in place sew down the side seams.
Sew the base piece to the bottom of the owl, remember to leave a gap for filling with Toy Filling or Wadding .
Sew eyes and beak into place.
All done!


nice. 5 star.
I made one and i love it! It is so cute and creative!
😀 🙂
They are adorable – great crafting! 🙂 Margaret
Me and my best friend made these and we named them Ollie and Puff. Craftbits is our fav craft website!! We also made plattie the platypus if you made the owl and you liked it then check her out!!
Very cute 😀
OMG THIS IS THE CUTEST THING I HAVE EVER SEEN!!! IM MAKING SOO MANY OF THESE!!! 5 STARS!
aawwwww super duper cutteee!
Aw, super cute:)
awww!! 2 cute! Thanks for sharing.