
Get more details about this project
What you need
clay pots in an assortment of sizes
twine
pencil
acrylic paint in assorted colors
Krylon clear coat sealer
craft foam
Aleene’s Original Tacky Glue
Beads for decorating the foam messages
foam stick-on letters
large plastic beads (one for each pot you will be using)
paintbrush
fine black marker
hot glue gun
hot glue
Instructions
You will need a variety of clay pots in assorted sizes to represent the members of your family. I used 2 “½’ pots for the parents, 1 ” ¾’ for the older children, and 1 “¼’ for the younger children.
1. Cover your workspace with newspaper. Draw the initial faces on each pot in pencil. Then use acrylic paints to finish them and add details. Allow paint to dry before outlining with black marker.
2. In a well-ventilated area, line the pots up on newspaper and spray with the clear coat sealer. Let dry and then spray on a second coat.
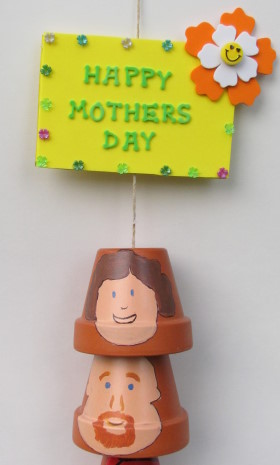
3. Cut two 4 “½’ by 3″ rectangles from the craft foam. Decorate with beads, foam cutouts, and stick-on letters. This will be the “Happy Mother’s Day” wind chime header.
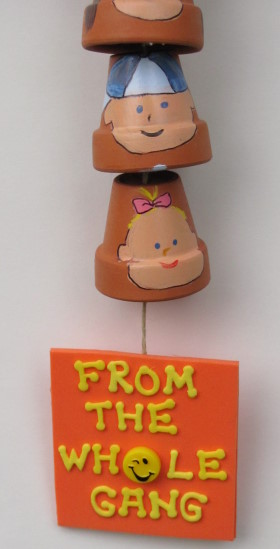
4. Cut two 2 ” ½’ x 3″ rectangles from the craft foam. Use the stick-on foam letters to create the”from the whole gang” message.
5. Cut a length of twine about 3 “½’ feet long.
6. String your largest pot onto the twine. Only for the first pot, you will leave about 1 foot of twine above it. This will allow room for the header and to make a loop for hanging.
7. Then thread on a large plastic bead. Beads must be large enough to stopper up the hole in each pot.
8. Apply a dab of hot glue to the bead so that it adheres to the under side of the pot.
9. Tie a knot beneath the bead to hold the pot in place.
10. Repeat steps 6 – 9 for each of your pots.
11. About an inch below the last pot, glue your “from the whole gang” rectangles back to back with the twine running between them. Trim off any remaining twine.
12. Above the first pot, glue your “Happy Mother’s Day” rectangles back to back with the twine running between them. Then tie a loop with the remaining twine at the top for hanging.


This is a good project for our sunday school kids to make this spring!
too cute! very clever!