
Get more details about this project
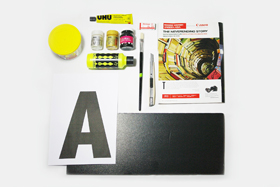
What you need
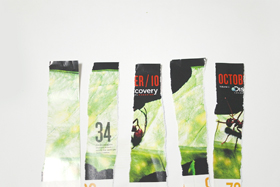
Old magazine pagesFoam board *
Printout of alphabet *
Penknife
Hard bristle brush
A piece of eraser *
White glue / mod podge
Black, gold and silver/pearl white paints *
Multipurpose Adhesive such as UHU
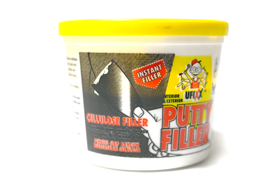
Putty filler *
Instructions
With real tactile textures you can feel, this alphabet block can also be finished in many other ways—wrapped with yarn, covered in fabric, studded with rhinestones… the sky’s the limit!
Your supplies
Notes:
1. Foam board alternatives: corrugated cardboard, Styrofoam, mounting board, very thick art card.
2. To make a print out of the alphabet, use a document program on your computer such as Word or Text Edit, type an alphabet in any font you like and enlarge the size of the font to your desired size (ours takes up almost an entire A4 sized paper).
3. The eraser is used to add depth to the block alphabet by sandwiching blocks of the eraser between 2 pieces of foam boards. Therefore, try to pick an eraser that is thick (approximately 1.5 to 2cm in height), as the thickness of the eraser will also determine the depth of the block alphabet.
4. Most paints can be used with this project, such as acrylics or poster paints.
5. Putty filler is an instant cellulose filler that can be easily found in any hardware store at a very inexpensive price. Often used to fill up cracks in wood, putty filler dries quickly to a hard plaster-like finish. You will only need a small amount to add texture to the block alphabet.
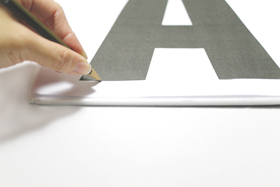
Step 1:
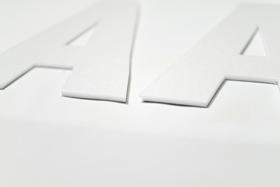
Place the printout of the alphabet onto the foam board and trace the outline with a blunt pencil, applying enough pressure to make an indentation onto the foam board.
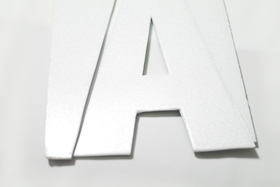
Step 2:
Using the blade, carefully cut out the alphabet shape that you’ve traced.
Step 3:
Repeat Steps 1-2 to make another alphabet cutout. You will now have 2 pieces of the same alphabet.
Step 4:
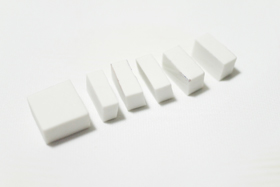
Using the blade, slice the eraser into small blocks of about 1cm in width each.
Step 5:
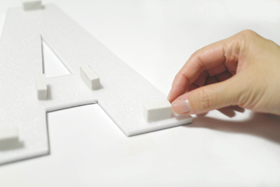
Using the multipurpose adhesive, stick the eraser blocks onto 1 of the alphabet foam cutouts. Even them out around the alphabet you’ve chosen. For our letter “A”, we’ve placed the eraser blocks on the top, bottom and center so that the other alphabet can sit on top of it in good balance.
Step 6:
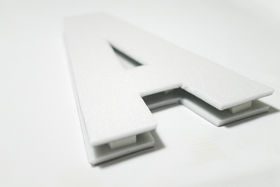
Dab some adhesive on top of all the eraser blocks and use the remaining alphabet foam cutout to sandwich the eraser blocks.
It is important that you line up both the alphabet foam cutouts as accurately as possible, because if it’s well lined-up, the alphabet block will be able to stand up on its own.
Step 7:
Tear the magazine pages into strips.
Step 8:
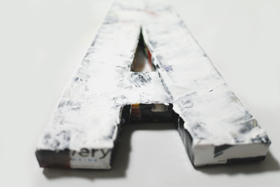
Brush white glue onto the alphabet foam and wrap the magazine paper strips around it like you’re wrapping a present.
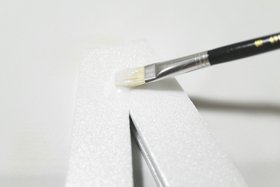
Brush on more white glue as you go along, as the white glue helps to harden up the texture of the magazine paper.
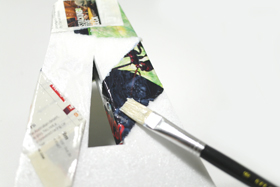
The strips of paper should conform to the shape of the alphabet, so it might take you a few layers to fully cover the alphabet.
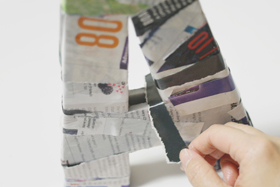
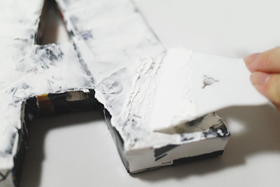
Should any strip overlap a corner, simply snip in at the corner and fold down the strip [see next image].
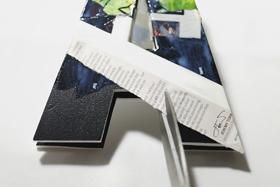
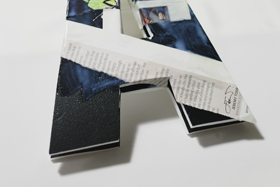
Remember to also cover up the gaps like the one above.
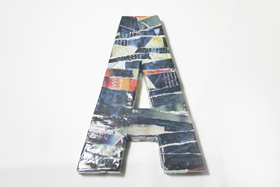
Step 9:
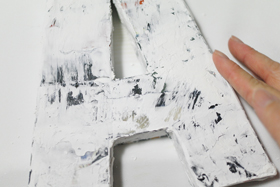
Once you’ve covered the whole alphabet (front and back, in and out) with the strips of paper, brush one more layer of white glue on top. Leave to dry.
Tip: For quicker drying, use a hair dryer!
Step 10:
Using a plastic scraper (or a disposable plastic knife), spread a thin layer of putty filler all over the alphabet form.
Since putty filler dries up pretty fast, using thin layers will enable you to work all over the alphabet form quicker.
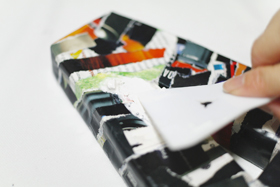
For a smooth texture, simply spread the putty evenly like spreading butter on bread.
For rougher texture, dab the scraper onto the wet putty to create bumps and ridges.
Once all sides have been covered with putty filler, allow it to completely dry.
Step 10:
Once the putty filler has dried, use your fingers and gently rub along the edges to smoothen them out. Some small putty filler grains will roll out, which is perfectly fine as we’re gently sanding the roughness away.
Now we’re ready for that metallic finish!
Step 11:
Remove any moisture from the paintbrush and make sure it is very very very dry.
Dip it into a bit of black paint and paint the alphabet form in a dabbing motion.

Try to get in between the ridges and grooves too.
Complete all sides and allow to dry.
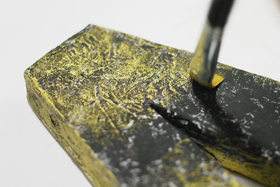
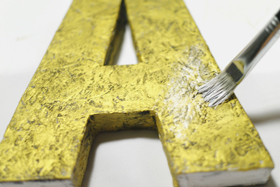
Step 12:
Once the black layer has dried, use a dry brush and dip it into a tiny bit of gold paint. Using a sweeping motion, spread thin layers on top of the black layer.
The sweeping motion of the brush only spreads the gold paint onto the top layers of the texture created by the putty filler, leaving the deeper gaps untouched and hence giving it a more three dimensional finish mimicking “aged” raw metals rather than just a flat colour.
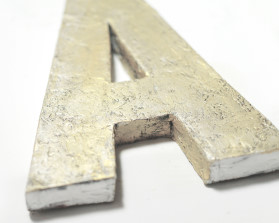
Step 13:
Once the gold layer has dried, top it with a light layer of silver/pearl white for an iridescent glow. Again, use the sweeping motion of the brush from Step 12.
Work on all sides, and leave to dry.
And you’ve completed your very own metallic alphabet block!


What do you think of this project? Let us know!