
Get more details about this project
What you need
Wool to match your biscuit
brown and white for Oreo’s
Instructions
Instructions for one biscuit
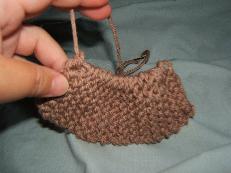
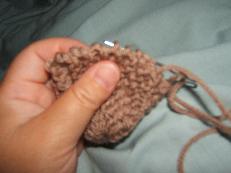
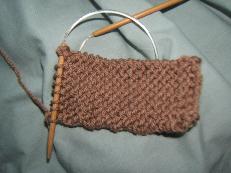
1. Cast on 8 sts.
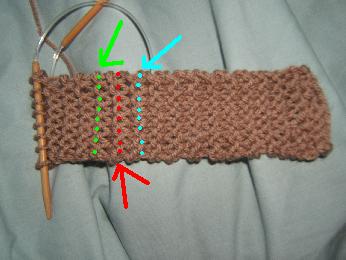
2. Knit 32 rows. You should have 16 garter-stitch ridges. You can see the ridges easily if you stretch out the knitting. I’ve highlighted 3 ridges here.
3. Cast off.
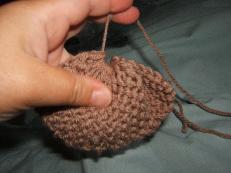
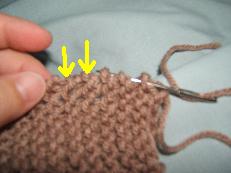
4. Gather one of the side edges. To do this, thread a needle with the yarn and pass the needle through the bump at the end of each garter-stitch ridge. I’ve highlighted the next 2 ridges so you can see what I mean. Pull tightly… Really tight! And tie it tightly too.
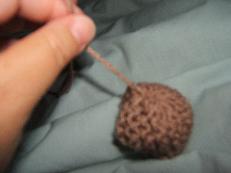
5. Sew up the cast-on and cast-off edges. Turn it inside out. You should have what looks like a little hat.
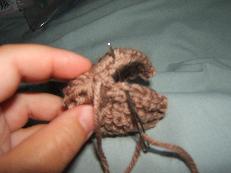
6. Gather the other side edge and tightly tie it off (same as step 4).
7. You now have what looks like a deflated beach ball. Take the centers of the balls (i.e. the gathered and tied-off side edges) and squish them together.

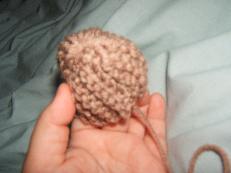
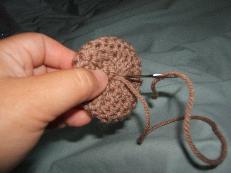
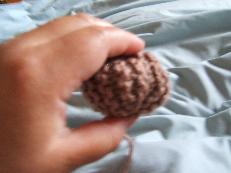
Sew a few stitches through the centers to keep the “beach ball” flat.
This recipe will make one biscuit. To make an Oreo cookie, make one white biscuit and two brown ones and sew them together.
This Project was contributed by Eva


so cute! my buildabears new best friend! kinda looks like and oreo cakester if u ask me!
im not sure i understand these directions
I used cream yarn and then made some chocolate chips and sewed them on afterwards. For me, I’ve done better things than sitting around making a whole jar of buiscuits for a friend as she said she just had to have some! Maybe I’ll make some other thing next time.
Cute, g2g off to the yarn stash.
nice directions!
This project was very quick and fun to do. I enjoyed making many of these into little oreo cookies!
This project was very quick and fun to do. I enjoyed making many of these into little oreo cookies!
This project was very quick and fun to do. I enjoyed making many of these into little oreo cookies!