
Get more details about this project
What you need
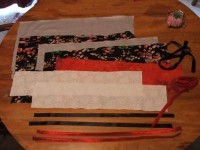
Fabric 1 yard in two prints and odd scraps.
3 yards of Ribbon
Instructions
1.) Starting with paper, make a template for the pieces of the needle roll. Use some sort of paper first, that way you don’t make mistakes on your fabric.
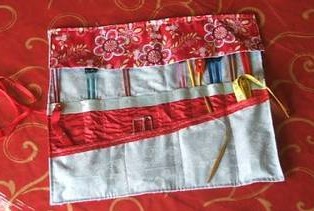
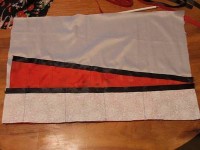
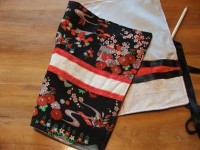
2.) Pin templates to fabric as follows: Exterior body and interior flap are fabric A. Interior body and exterior flap are fabric B. Main interior pocket will be fabric C, and Bottom pocket and outer “Obi” (the strip of fabric that wraps around the exterior to look like a kimono sash) are fabric D.
I used four different fabrics, but it isn’t necessary. (Do what looks good!)
Cut out all fabric.
Also, you want to cut two strips of ribbon for the outside of the wrap, and two for the inside, plus one more to serve as the tie. All the pieces, except for the last one, will be cut to fit the width of the needle roll. (I used 21″)
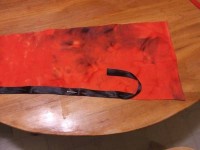
Cut the ribbon that will serve as the tie longer than the width of the roll. When it is folded in half, it should be long enough to wrap around the finished rolled and tie into a bow.
3.) Starting with the main pocket (the diagonal cut one): Fold a seam on the diagonal, and iron it down to make sewing easier. Pin ribbon to the diagonal. Using a thread that matches the ribbon color, stitch the ribbon in place.
4.) Next, take the rectangle that will serve as the bottom pocket, and repeat the above step with another ribbon.
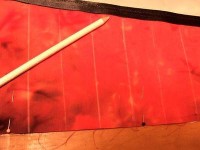
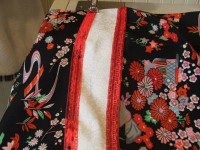
5.) Take diagonal cut fabric and pin to interior panel, ribbon side facing up. Using a water soluble pencil and a ruler, make marks on the top and bottom of the diagonal fabric at 1.5″ intervals, keeping in mind seam allowances. After marking top and bottom, use a ruler to connect each line. Using the chalk marks as a guide, sew along each line. (This makes the long thin needle pockets.)
6.) Pin what will be the bottom pocket to the bottom of the diagonal pocket. Using the diagonal pocket as a reference, draw a line every three or so spaces. Sew along the drawn lines. IMPORTANT: make sure when you sew your lines you are on top of a previously sewn line, otherwise you are going to sew through your previously made needle pockets.
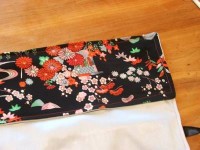
7.) Take the fabric panel that will be the “Obi” Fold the seams and iron them, making the obi as wide as you want. Find the center of the exterior body panel and position the obi over it. Take the two ribbons designated for the outside of the roll, and pin them, and the obi, to the fabric panel. The ribbons should be pinned along the top and bottom edge of the obi, so that it slightly hides the seam. Sew through each ribbon, fastening the obi to the panel.
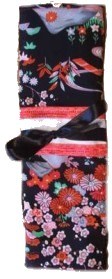
8.) Assemble the needle roll. Place both exterior and interior panels together, wrong sides facing out. Take the ribbon that will serve as the tie, fold it in half, and position it in the center of one side of the roll. Pin it so that the ribbon is sandwiched inside the panels, leaving only a little loop made by the fold sticking out of the side.
9.) Starting near a corner sew all the way around the edge of the two panels, as if sewing a pillow case. Leave a few inches open, for turning. Trim excess fabric and clip the ends of the corners.
10) Turn work right side out. Using a pencil (or a knitting needle) push all the corners out and to a point. Using a hot iron, carefully iron entire roll to create crisp edges. Fold in the fabric around the open hole and starting there, sew around the roll one more time, to give the edges more definition.
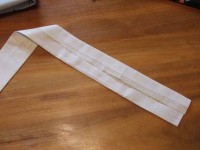
11.) The flap is saved for last because it is smarter to adjust the size of the flap to match the roll, rather than the other way around. (During the sewing process, your roll’s dimensions will change!) Sew the flap, wrong sides out, just like a pillow case, leaving one of the short sides completely open. Trim the excess and turn the fabric out. Iron it flat, and using the needle roll as a reference, fold the seams inward until it is the same width as the roll. Starting with the folded opening, Sew a seam around the outer edge of the flap.
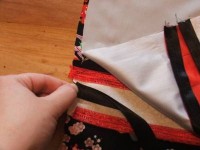
12.) Pin the flap to the top interior of the body. The lining fabric should face down, and the fabric that matches the exterior should be facing up. Sew along the top edge.
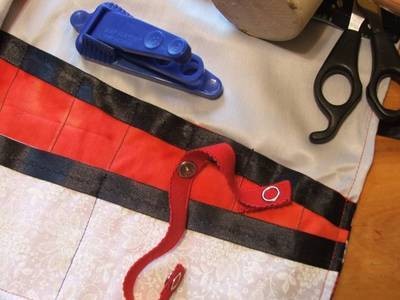
The stitch marker strap is really easy to put in. You can use ribbon, or like I used, the elastic straps used for bras and camisoles. (I bought a scrap bag that had a ton of that stuff.) Use snaps to attach it to the diagonal pocket and more snaps to make the loop that will hold the markers. You don’t need any special equipment for the snaps I used, but there is a holder that makes the job a whole lot easier! (Pictured.)
Make sure your strap is long enough to fit into one of the bottom pockets.
Also, depending on the fabric you use, you might want to add interfacing. I didn’t, and my needle roll, made mostly of stretch fabric, is a little floppy. Voila! Done!
This project was contributed by Christina Donaghy who spends her time knitting and sewing, and taking care of her two kids.


For those of us who need a template I would suggest making your own, including size. I wanted mine about the size of an ordinary 8.5 x 11 spiral bound notebook so I am using an ordinary notebook (opened up) as my template.. I also don’t work well with seambinding so I am going to be a bit creative and use a hot glue gun and satin ribbon. Also I am going to skip the flap, too much work there. Mine is going to have enough fabric at the to to simply fold down or “self flap” ;). You don’t have to excusively sew this thing. Get creative. It doesn’t have to be all or nothing sewing. I also may try adding small pearls or a fabric or crocheted flower to the outside; again with a hot gluegun. Have fun with this! What can you lose- a few dollars in fabric and at least you tried. Mine will cost
all of $1.50 I bought home decor remnant half a yard on clearance and left over ribbon from another project, an old teeshirt for the flower, scraps, bits and leftovers from my scapbox stash. Use what you have use your imagination. Just saying.
Beautiful but with no pattern pieces or dimensions it is rather difficult to figure out wanted to make this for my needles but going to pass for something with an actual pattern.
Excellent project – I have been looking for something like this. I only had heavier fabric to hand, so used bias binding rather than turning inside out, but everything fits inside!
I love this! It’s so beautiful, I’m going to use it for my hooks
love it! 🙂
perfect! i keep losing all of my needles. now i have somewhere to put them!
I have made this for my Mum for Christmas…. I am so excited to give it to her she has knitting stuff everywhere 🙂 Thanks
it would be nice to have dimentions or pattern pieces to print really cute project though!
I love it- i found this pattern over a year ago and have made 3 variations on it, all dearly loved gifts! thanks.
This looks great, but with no sizes or numbers, it’s pretty hard to follow the tutorial. A couple of the pictures are a nice size, but most of them are too small, and don’t open larger in a separate window. Great project, but not so great tutorial.
very handy
This project was easier than I thought. Thanks, made a great gift for my mom.
please put a template, it is too hard to guess.
Such a brilliant idea and the tutorial is much easier than it looks when you get going. Just finished it for a Christmas gift for a friend in beautiful William Morris fabric and I know she’ll love it! Thanks so much.
excellent – really easy to follow
Could use some full size templates for patterns. Are u supposed to guess size and shape for all the pieces
Anyone make a pattern that works and willing to share???
Thanks!
Looks great, but would dearly love to have the template, or some guide as to the size of each piece. Desperate to make one for a friend, so can anyone say what the dimensions are please.
Its stupid it has nothing to do with knitting
I am also wishing there was a template or pattern guideline, even something with dimensions. Is this an edited version?
That is really beautiful. I LOVE it!
Looks beautiful but the pattern has no Pattern? where are the dimensions for the template. ???
nice job and and keep p the good work
pattern could use a little more instruction, but if you’re willing to wing it bit, it’s a great tutorial.
it looks way too hard and i was looking for somthing that has to do with knitting not knitting needles
very pretty and useful.
i was about to knit me a case, i may make this one, love the idea of the kimono.
I got one of these as a gift before I started sewing. It’s adorable and very well designed!
most beautiful needle role I’ve found. Thank you so much!
um.. kool.. go to knitting patterns and then knitting- wearables and then go to funky band shirt and rate it.. please everyone!!!
I love it! I just needed a little enlightment! I had a “general” idea, but now I have a point where to star.
thanks a lot and congratulations!
I’ve made this for myself and for a gift and its a little fiddly stitching the pockets but the end result is really good, you need to have some experience.
I can’t believe no one has commented! This is practical and adorable.
been looking for a pattern like this.