
Get more details about this project
What you need
Three Rocks
Craft paints: White, Leaf green, Red and black
Saral Transfer paper
Pencil
One extra fine brush (for details) and regular paintbrushes
Clear Varnish (optional)
Instructions
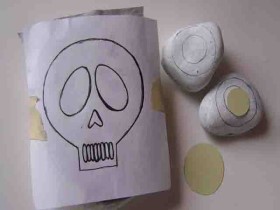
Find one flat rock and two smaller ones. Wash them well and base coat all rocks with white paint at least twice. Let it dry.
Enlarge or reduce the pattern to fit your rocks. Use Saral transfer paper and a pencil to transfer pattern onto rocks.
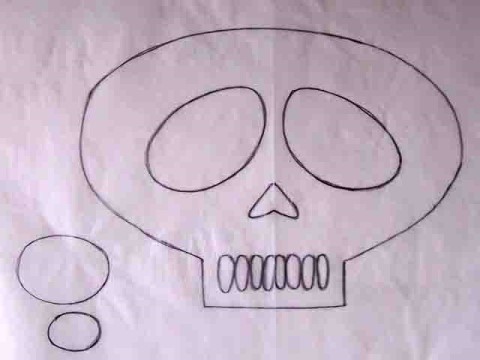
For eye balls cut round circles from a thin piece of cardboard to help transfer circles easier.
Paint all black areas. See photo. Retouch the white areas if necessary.
Let dry.
Use leaf green to paint the eyes or any other color of your choice. Use a fine brush and black paint to outlines eyes and teeth.
Use red and a fine brush to loosely paint veins in its eyes.
There is no right or wrong way to paint veins but if you find that you need to erase just repaint over them and start again.
Note: Apply a coat of varnish if rocks will be place outside to protect them from the elements.
Have fun!


Cute but that Saral paper is a little expensive for my entire class. Any cheaper ideas?