
Get more details about this project
What you need
Tissue box 9″ (23 cm) x 5″ ( 12 1/2 cm)
Fabric Glue
Card
Felt – brown 20″(51 cm) x 24″(61 cm)
White 12″(30 1/2 cm) x 24″(61 cm)
Green 4″(10 cm) x 3″(7 1/2 cm)
Gold 6 1/4″(15 1/2 cm) x 3″(7 1/2 cm)
Instructions
First, print out these patterns:
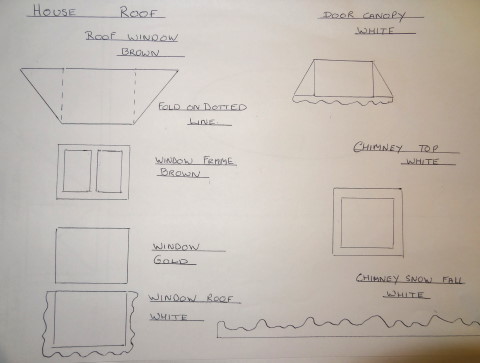
Felt Christmas House – Roof Pattern
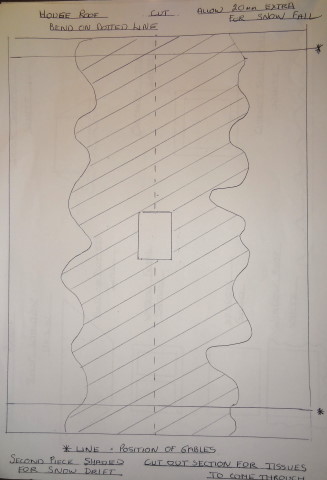
Felt Christmas House – Roof Pattern 2
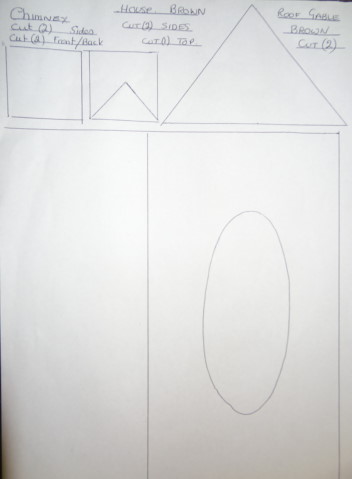
Felt Christmas House – Side Pattern
Cut out all your box pieces out of card. You will not need a bottom to your box.
You will need to cut away the perforated section of the box but will need for it to be kept open even when you are covering it. This is because you will need to still pull the tissues out. Only then it will pull through the chimney.
Now cut the same pieces out of brown felt (or whatever colour you would like your house to be) leaving a 1/2″ (1 cm) allowance. Glue the felt to the card and turn the (1 cm) over and glue to the back.
Once you have done all your pieces (5) glue the edges together (hold in place with pins) until secure (you can stitch the pieces together if you prefer). Complete the house section, before going on to the roof.
Cut out your Christmas tree from the green felt, decorate with beads, fabric paint or tinsel.
Glue it to the end of your house.
Window
Cut your window out of gold felt, then a second window out of wall colour with the window panes cut out.
Glue this on top of your gold piece, and then glue it to the front of your house to one side slightly.
Cut your candle out and arrange it to sit in one of the windows and glue it in place.
Cut out a green door and glue it in place. You can either use a bead or a tiny circle of felt for the door knob. I made a tiny wreath for the door by cutting a circle out of dark green and decorating it with dots of fabric paint. This was quite effective.
Now cut out the door canopy from card and cover it with white felt positioning it over the door.
Pin it in place until secure.
Roof
Cut your roof and gable ends from a piece of card (cut your roof in one piece).
Find the center and then cut out you chimney section.
Next cut you gable ends out of brown felt and do not forget the 1/2″ turn over allowance.
Glue on to the card. Once it is dry, glue them onto your roof at the position stated on the direction sheet.
Make sure it sits just on the top of the tissue box.
Once it all feels secure, cut out and glue your white felt on the roof leaving enough allowance for a snow fall, front and back and both ends (do not glue the roof to the walls).
Cut the chimney section out again.
Now cut out your second piece of roof (in felt only). It would be much easier to cut your chimney section out now before you glue it in position.
To cut out your chimney use your picture for directions. Cut it out of card and then out of brown felts when it is completed.
You can begin to put your snow around the top.
Now glue the chimney in place.
Last of all is the roof window. Cut the window out of card then cover the sides in brown with white on top (with a small allowance for snow fall). Put gold on the front and then a second front out of brown felt with the panes cut out.
You can now glue your window snow on.
Put your house over your tissue box and thread your tissue up and through the chimney.
If you want to keep little fingers out you can attach it at one end then put a button and elastic loop at the other end.
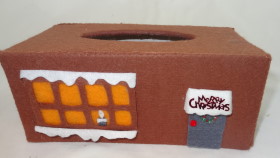
Christmas house open
All done!


Too cute!! I LOVE this project!!
how did you know what size to cut sides of house etc? The pattern isn’t very clear about size.