
Get more details about this project
What you need
Glue gun/ clear glue sticks
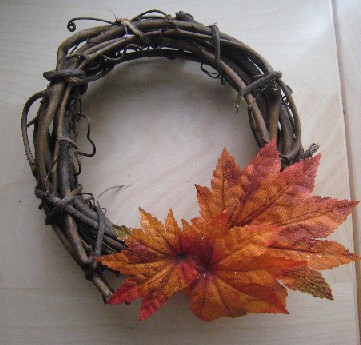
Brown twig wreath (any size)
Glittery faux bird
Silk fall leaves (with glitter- even better!) and varying sizes
Swarovski crystals in matching colors to the leaves (optional)
Instructions
Heat up glue gun and put in glue.
Clip some of the fall leaves off the stem of the flower pick.
Determine how you want your wreath to look. For example- bird on top, inside or on the bottom. How many leaves to place around the bird or on the sides?
In the case of our example, attach the two biggest leaves on first with a dab of glue on the stem and back of the leaf.
Attach the smaller leaves inside the bigger leaves for a nesting effect or scatter around the wreath depending on your preference.
Attach the bird with the hot glue and arrange leaves around the base of the bird to hide the glue or clamp.
Very gingerly, dot the center of one of the leaves and quickly pick up and press in one of the Swarovski crystals. This is much easier than trying to apply glue to the back of the crystal and then press into the leaf. (Also, less burning on your fingers.)
If you want to attach a hanger or ribbon to the top, do so now, otherwise, you’re done!


Beautiful and so simple too! xx