
Get more details about this project
What you need
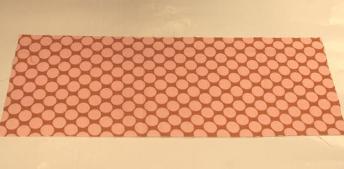
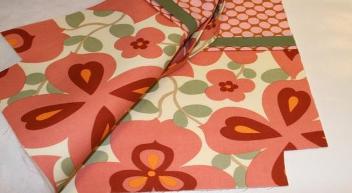
5/8 -yard fabric for bottom & straps 5/8-yard fabric for top, pocket & large strips
5/8-yard fabric for lining & small strips
1-yard fusible fleece
Supplies needed
All purpose thread to match fabric
Scissors & Rotary Cutter
Pins
Sewing Machine
Iron Ruler
Cutting Fabric
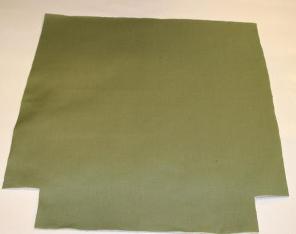
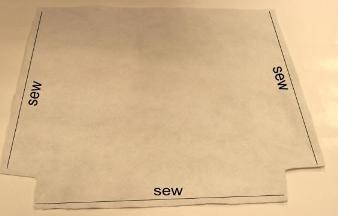
Cut 2-15″ w x 10″ h- bottom tote fabric
Cut 2- 15″ w x 5 1/2″ h- top tote fabric
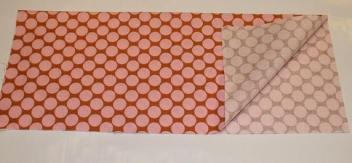
Cut 2- 15″ x 15″ lining fabric
Cut 2-2 1/2″ x 15″ for large strips
Cut 2- 2″ x 15″ for small strips Cut 1- 12″ x 15″ for pocket fabric Cut 2- 4″ x 22″ strips of fabric for straps
Cut 4- 15″ x 15″ fusible fleece
Read through entire pattern before starting to sew.
Remove all pins before sewing over them.
All seams are a 1/4″.
Instructions
Sewing on Strips and Top Fabric of Tote:
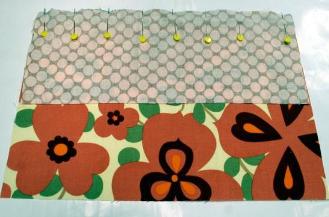
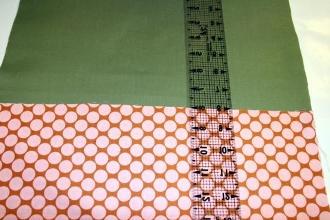
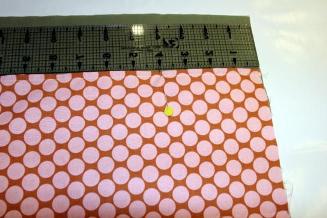
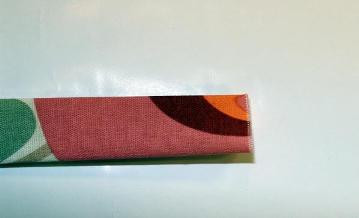
1) Take 2- strips of fabric, large and small, fold them in half the long way and press.

2) Take one 15″ x 10″ fabric cut and place the large strip on a 15″ side, raw edges of strip meeting raw edges of fabric cut.
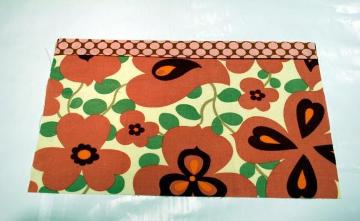
3) Next take the small strip and place on top of the large strip, once again, raw edges of strip meeting raw edges of fabric.
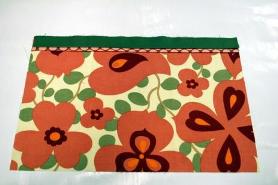
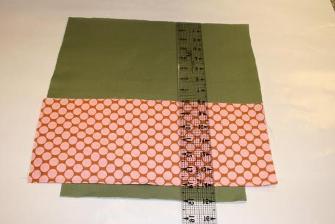
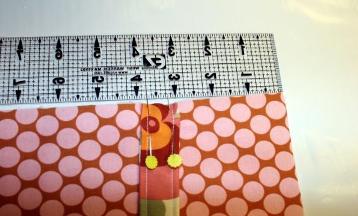
4) Take the 5 1/2″ x 15″ fabric cut and place right sides together, on top of the small strip, raw edges meeting.
5) Pin in place and sew a seam.
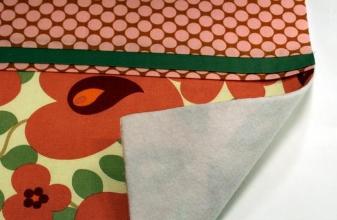
6) Unfold and press the top.

7) Press the back of the fabric, press seam down, in the natural direction.

8) Starting at Step 1 up to here, sew the other side of tote the same way.

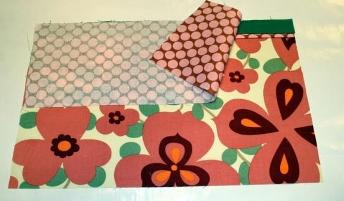
Ironing on Fusible Fleece & Cutting Corners:
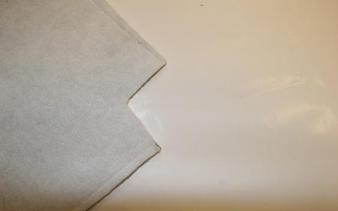
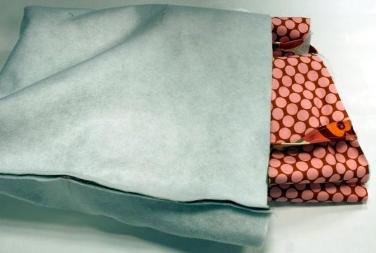
1) Take the 2 outside fabric cuts you just sewed together and the 2 lining cuts, iron on fusible fleece following manufactures directions.
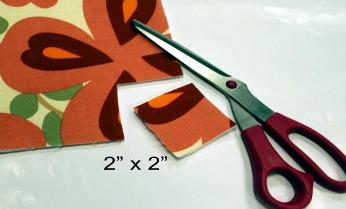
2) Cut a 2″ X 2″ square out of 2 bottom corners, on the outside and lining cuts.
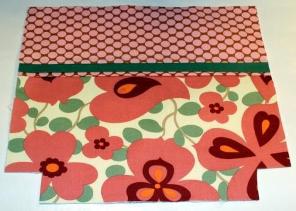
3) The 4 cuts of fabric should like the pictures.
Pocket:
1) Fold the 12″ x 15″ pocket fabric in half, wrong sides together, press and topstitch the folded edge.
2) Place the pocket 8″ down from the top of one of the lining cuts, raw edges up.
3) Pin in place and sew.
4) Fold the pocket up, press and topstitch the bottom seam.
5) Measure in 4″ on each side of the pocket and mark it with a pin. Sew from the bottom of the pocket to the top at each pin and back stitch at the top to make the pockets more secure. This will make 3 pockets.
Straps:
1) Take the 2- 4″ x 22″ strips of fabric, fold raw edges to meet in the middle and press.

2) Fold again, making a 1″ strap and sew close to both long edges.
3) Take the outside of the tote and place the strap 3″ in, raw edges of strap meeting raw edges of fabric and pin in place.
4) Make sure the strap is straight, before you pin and do the same for the other end. Sew a zigzag stitch close to the edges to secure in place. Now, take the other outside fabric cut and sew the strap in place the same way.
Finishing:
1) Take the two outside fabric cuts and place those right sides together. Make sure the strips of fabric on each side line up.
2) Pin and sew the sides and the bottom, leave the corners and top open.
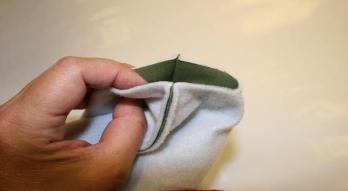
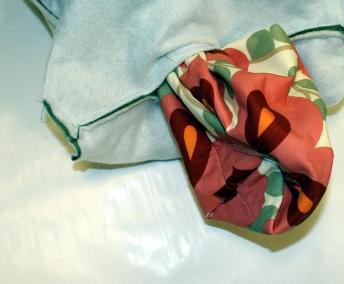
3) At the corners.
4) Match the side and bottom seam, pin and sew.

5) Turn the tote right sides out.
6) Take the 2 lining cuts, place right sides together, pin and sew the sides and at the bottom leave a 3″ opening for turning. Sew the corners the same as the outside of the tote. Leave the lining wrong sides out.

7) Put the outside of the tote inside the lining with the 3″ opening at the bottom, right sides together and make sure the straps stay inside the tote. Match side seams and pin all around the tote top and sew. Back stitch over the straps to make them more secure.
8) Turn right sides out through the 3″ opening and hand stitch the opening closed. Press and topstitch all around the top of the tote.
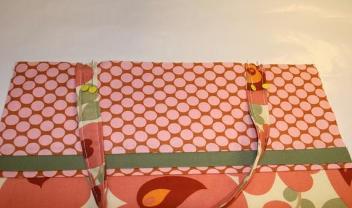
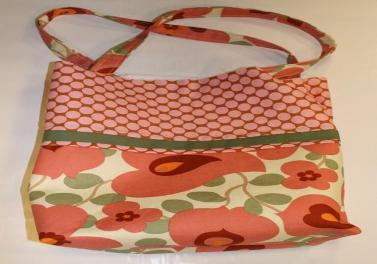
9) Your Daydream Tote is done and looks great!

Daydream Tote Finished


Thanks for the great tutorial. My tote bag turned out wonderfully. You have great directions and photos..
Just finished making this, and I’m really happy with the result. Thanks so much for the great instructions!
Just the most beautiful tote bag – Great pics & instructions – Love the material used – Thanks
cool choice of fabrics…looks very fresh and perfect for a sunny day…and a nice tutoral too – it’s always fun to see how others mix colors and fabrics 🙂
I like the step by step instructions with pictures and the finished product is something that I can be proud of. It should get comments like “where did you buy that tote?”
pretty tote, but honestly I have just seen so many totes and I am ready for something different
An excellent pattern! Thank you!
The very nicest project I’ve seen on Craftbits. Thank you!
Fantastc project!
That Is so much better than just one fabric. Those fabrics are really cute, too!
Great job!