
Get more details about this project
What you need
Note: This yarn is discontinued. Substitute cotton baby yarn of your choice.
MC: Lily Sugar Babies (100% cotton, machine washable, 140g per ball), colour 01210 (peach), less than 1 ball
CC: Lily Elite Cotton (100% cotton, machine washable, 100g and 169m per ball), colour 05620 (yellow), a few yards
1, 3.75mm circular needle, or size to obtain gauge (OSTOG)
1, 4mm circular needle, OSTOG
1 set 4mm double pointed needles, OSTOG
stitch markers
safety pins or contrast yarn for marking positions
yarn needle for finishing
small amount of batting for stuffing drumsticks
Instructions
Size
6-12 months
Finished measurements
16.5 inches (40 cm) around, stretching to 18 inches (45 cm)
Gauge
18.5 sts and 28 rows per 4″(10cm) in pattern, using larger needles
Seed Stitch
1st and alternating rounds: *K1, P1* to end.
2nd and alternating rounds: *P1, K1* to end (so as to P all K sts from row below and vice versa).
Goosebumps (on a multiple of 4sts)
1st and alternating rounds: K to end
2nd round: *P1, K3* to end
4th round: K2, *P1, K3* to last 2 sts, P1 K1
Method
Main hat
Using MC and smaller needles, CO 80sts. Join stitches into a round (don’t twist!) and place marker at beg of round. Work 5 rounds in seed stitch.
Switch to larger needles and work 16 rounds in goosebumps.
*K2tog, K14, place marker* to end of round (no need to double-mark end of round).
Continuing in goosebump pattern, k2tog after each marker on alternating rounds another 7 times (40sts on needle), then every round 7 times (5sts on needle). Remove markers.
Break yarn and draw through remaining sts. Pull yarn to inside of hat and weave in end securely.
Earflaps and ties
Mark center front and back of hat.
Count 10sts from center back along bottom hem. Using MC and smaller needle, pick up 20sts towards center front.
Beginning with a RS row, work 3 rows seed stitch.
Dec 1 each end of this and every other row, 4 times (12sts on needle).
Dec 1 each end of every row 4 times (4sts on needle).
BO remaining sts.
Cut 6, 20 inch (50cm) lengths of MC yarn and thread them evenly through BO edge of earflap to make something resembling a 10 inch (25cm) fringe.
Holding 3 bundles of 4 strands, braid ties to desired length (9-12 inches, or 22-30cm). Tie strands securely in an overhand knot and trim loose ends to 1 inch of knot.
Repeat for other side.
Drumsticks
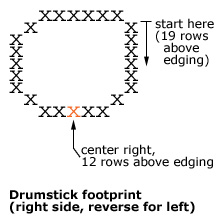
Note: Determine drumstick placement visually or use these guidelines: center of side, 12 rows above edging, corresponds to center bottom of drumstick as shown in diagram.
Using DPNs and MC, and beginning at top back corner of future drumstick, pick up 25sts in a back-slanted circle.
(RS) K 1 round.
Work in goosebumps to last 3sts, turn.
P to last 3sts, turn.
Work in goosebumps to last 4sts, turn.
P3, P2tog, P7, S.S.P, P to last 4sts, turn.
Work in goosebumps (as best you can) to last 5sts, turn.
P2, P2tog, P5, S.S.P, P to last 5sts, turn.
K2, K2tog, K3, S.S.K, K to last 6sts, turn.
P1, P2tog, P1, S.S.P, P to last 6sts, turn.
At this point, pause and stuff the drumstick before the opening disappears.
K1, K3tog, K to end. (15sts on needle)
K2tog to last st, K1. (8sts on needle)
K 2 rounds
K2tog to end (4sts on needle)
Note about feet: Toes are made as a variety of tiny i-cords, which hang off at all angles, sometimes by single threads. These are sewn up properly during finishing. It would undoubtedly be easier to crochet these, if you’re that way inclined (crochet instructions here).
Switch to CC and work 4 rounds as i-cord.
K2. Break yarn and draw through these 2 sts to make heel spur.
Join yarn to remaining 2sts. Inc 1 twice.
Still working as i-cord, inc 1 into first st.
Treat these 2 sts as separate i-cord and K them again. Break yarn and draw through these 2sts to make toe.
Join yarn to remaining 3sts.
K2, treat as for previous toe.
Join yarn to remaining 1 st. Inc 1, K2 as i-cord, break yarn and draw through.
Repeat for other drumstick and foot, picking up in opposite direction in order to begin with a RS round.
Finishing
For the feet
Draw each toe’s end tail down through toe and bury in drumstick. Shape each toe to a point.
Sew toes securely into desired positions using remaining tails. Bury yarn ends in drumstick.
Weave in remaining ends.
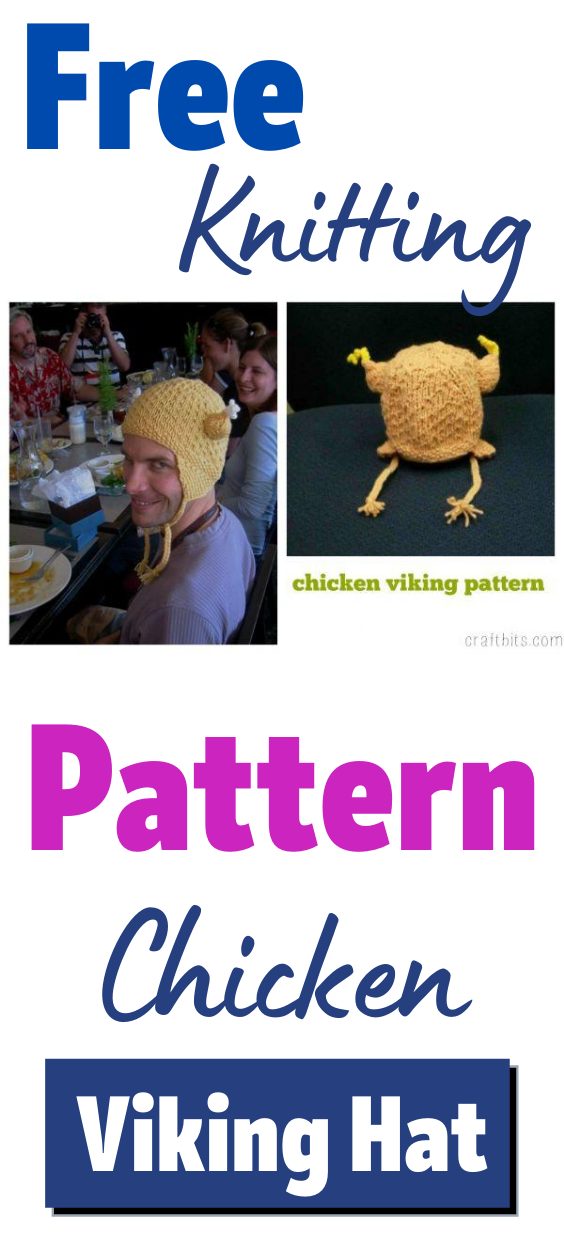
This project was contributed and designed by Sarah Mundy from Aloha Misc. Media House
This pattern can be remixed and distributed for non-commercial purposes, with attribution. See its Creative Commons License for details.
Images: Steve in the chicken hat by Chris Radcliff, on Flickr and chicken viking! by woollypunk, on Flickr


WOULD REALLY LIKE IT IN ADULT SIZES, PLEASE !!
This is just mad and I love it.
Nothing like Viking hats and chicken butt.
The lack of an adult size is a disappointment, but not insurmountable. Babies’ heads are large in proportion to their bodies, and an adult’s not so much! There can be about 2″ to 4″ difference in circumference.
Amazing pattern! I made one for myself and now all my friends and university want one!
i have a 23 yr old sister who would love this hat is it possible for you to do an adult size pattern?
lol! I love it! Where on earth did you get the idea?! Thanks for the great pattern!
I have made several of these and LOVE them!!!! I prefer to make the drumsticks seperately and them stitch them onto the hat. It is much easier for me that way.
its genius!!! but a bit confusing…
oooo.I need one of these!
Material listing is now fixed.
WHAT SIZE NEEDLES ARE REQUIRED??????
The Pattern does not show what needles or other equipment is needed. Please add to instructions.