
Get more details about this project
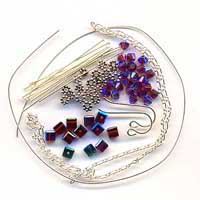
What you need
1 foot fine sterling chain w/open links
10 24g sterling silver headpins
9″ 24g sterling wire (half hard)
1 pair sterling ear wires
20 sterling spacers
22 4mm crystals
12 6mm crystals
Instructions
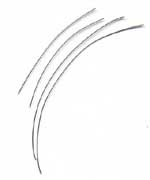
Step 1 – Cut wire: 2 pieces 1 1/2″, 2 pieces 3″.
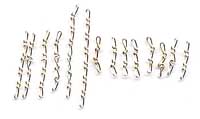
Step 2 – Cut chain: 8 pieces 1/2″, 4 pieces 3/4″, 2 pieces 1 1/4″
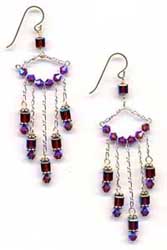
Step 3 – With one 3″ piece of wire create a wire wrap loop & attach to earwire.
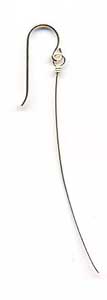
Step 4 – Add one 6mm bead. Place the tip of the chin-nose plier against the bead and bend wire to a 90ْ angle.
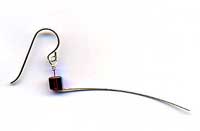
Step 5 – Make loop bringing the wire tail back to a right angle.
Step 6 – Slip two 1/2″ pieces of chain into the loop.
Step 7 – Wrap wire until it meets the base of the bead. Trim wire & tuck end down.
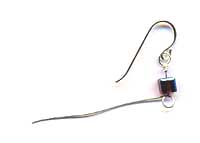
Step 8 – Make a simple loop on the end of the 1 1/2″ piece of wire, link onto one of the pieces of chain dangling from the earwire.

Step 9 – String 4mm beads & chain on wire alternating in this pattern.
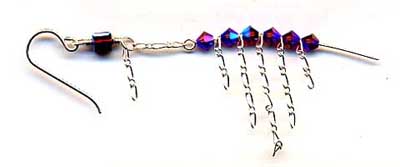
Step 10 -Trim wire to 1/4″. Make loop after the last bead and link to the other piece of chain attached to earwire, bend gently to shape.
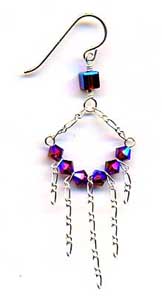
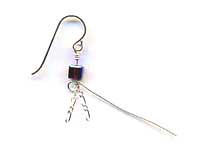
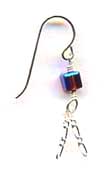
Step 11 -String a 4mm bead, a spacer, a 6mm bead and another spacer onto each of the headpins.

Step 12 -Male a loop & attach to the ends of the chain.

Step 13 -Go out on the town & show off your amazing new earrings.
This project was contributed by Beadstudio.com Visit their website for beading supplies, projects, classes and articles


Great! Gives me something to do in the holidays! I love earrings but I don’t have my ears pierced so I just replace the hooks with magnets I bought. They are so sophisticated!!! I’ve literally just started beading, so maybe I’ll attempt these later, the look rather complicated! Definetly helps having the pictures there as well. LOVE IT!!!
Cool! 🙂
oh wow this would go great with a choker of the same color its great
Great tutorial. I’m just getting into doing beading, and I much prefer when the tutorials have pictures for each step. As soon as I buy some chain I will definitely try making these.
I am so going to make a pair! This is awesome!
cool but i think its a bit hard
Love that idea~~~
these are the prettiest earings I have ever made!!!!
These are so adorable. Can wait to make a pair.
These are very cute!!!!!!!
omg they r soooo cute!!!!!!
now that is funky!!!!
now that is funky!!!!
Nice earrings and an easy to follow guide to making them. Just need to finishe them off with a Clear or Metal Drop Stop earring back so they won’t ride up and out of your earlobe by chance.
You can find these and more at http://www.EarringDoctor.com.
I love earrings and this is a great idea, something a little different. thank you
thanks for all the visual steps:)
Thanks for sharing your knowledge, Im just a beginner,I liked the pictures, much easier to understand. I love it! thank you.
-Dona Chioa
I will give it a try. Thank you/
cool am tryin these
Beautiful!
LOVE THEM
I like it but I know its hard to do for my project but I think I’ll do it because its beautiful.
I love the step by step! VERY informational! This is EXACTLY what I need to bead!
hi this is chinchilla,just didnt log in yet,these are sooooooo cute!!!i love them and i will make them right away!!!!love it love josie