
Get more details about this project
What you need
12×12 cardstock (4-5 pieces)
Patterned paper (to cover your pages and the top of the box)
Adhesive
Scrapbook embellishments (metal embellishments, ribbon, paper flowers, etc)
Paper trimmer with scoring blade or an embossing tool
Creativity
Instructions
Scrapbooks come in all shapes and sizes. Preserving photo memories can be done several different ways. Mini-scrapbooks are a great way to focus on one subject and scrap specific pictures for your self or to give to someone else.
Step 1
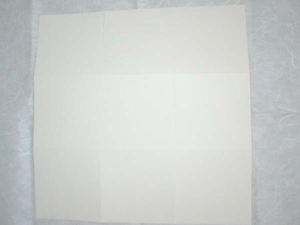
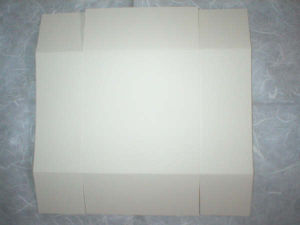
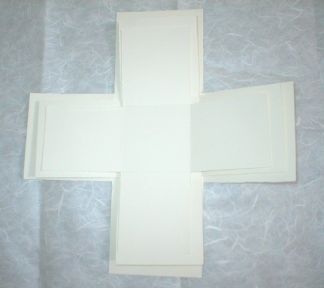
Take a 12 x 12 sheet of cardstock (this will be the base of the box) and cover it with patterned paper or randomly stamp the paper. Then score the inside (the blank side) of the paper at 4″ on all four sides. Cut four corner squares to make a “cross” with your sheet of paper.
**Tip** It is easier to glue the pattern paper to your cardstock first so that you can cut both pieces of paper at the same time.
Cardstock Step 1
Cardstock Step 2
Cardstock Step 3
Step 2
Take your second sheet of paper and cut it to an 11×11 size. Now score the corners of this paper at 3 3/4″. Again cut the four corners to make your “cross”.
Step 3
Cut the third sheet of paper to a 10 x 10 size and score the corners at 3 1/2″ and cut your four corners.
Step 4
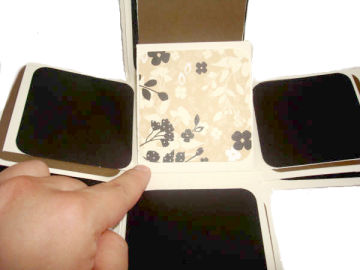
Next embellish your individual pages and glue on the photo mats. Your squares will be scored to make them easy to fold. Decorate the pages before you assemble your album.
Step 5
Layer the pages on top of each other starting with the largest (12 x 12) on bottom, then stack in order of size. Glue each layer in the middle only so that the pages can be flipped and pictures or embellishments can be adhered on both sides. Once the box is assembled it will be to decorate and add photographs. You can use your own photos or give a blank album as a gift and let the recipient add their photos to complete the scrapbook.
Step 7
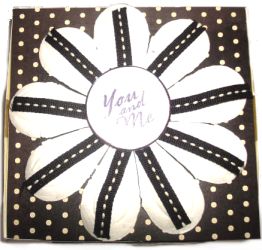
Fold the four sides of the paper up into a box and top it off with an embellished lid. You will be left with a 4 x 4 mini-scrapbook box.
Scrapbook-in-a-box lid instructions:
With your 4th piece of cardstock you can make a lid for the scrapbook-in-a-box mini-album. Cut the paper into an 8 x 8 square. Then, score it at 1 7/8″ on all four sides. Next, cut one side of each corner so that it leaves a flap of paper to tuck in when you fold the lid together. You may want to decorate your lid before you form it and glue it together. Once you have completed your album then fold up the sides of your box and place the lid on top.
Tips
Use a light colored paper for your base and fill in the album with color coordinated embellishments and photo mats.
Save the squares you cut out and use them to make layered photo mats, journal blocks or tags.
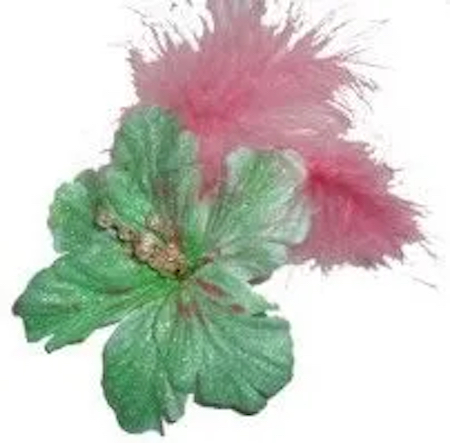
Paper flowers, buttons, chipboard and other 3-D objects make wonderful lid embellishments. (in the picture a large paper flower lined with stitched ribbon was used)
The sides of the lid can be lined with paper strips (use up your paper scraps) or ribbon. Adhesive backed ribbon works well.


So thrilled to find your web site. I have seen this done before.
Thank you so much for the instructions.
wow you’re amazing great job
Love it! What a neat idea. Easy to follow instructions!
I have seen a box close to this they are very cute. Thanks for the instructions.
This is a great idea!! It will make a great gift for a birthday or mother’s day. I will give this to my mother for mother’s day (august 15 in Costa Rica. It can even be changed to something less formal and make it for a child or for a man.
This is too cute! Fabulous gift idea
Too cute.
Got one of these for Christmas. It is so cool. Have looked everywhere for instructions. Can’t wait to make these and give as gifts.
doesnt look easy but i think the finished product will look cool
a fresh idea 4 me
Very good directions
didn’t look very easy
looks like fun
Gorgeous!